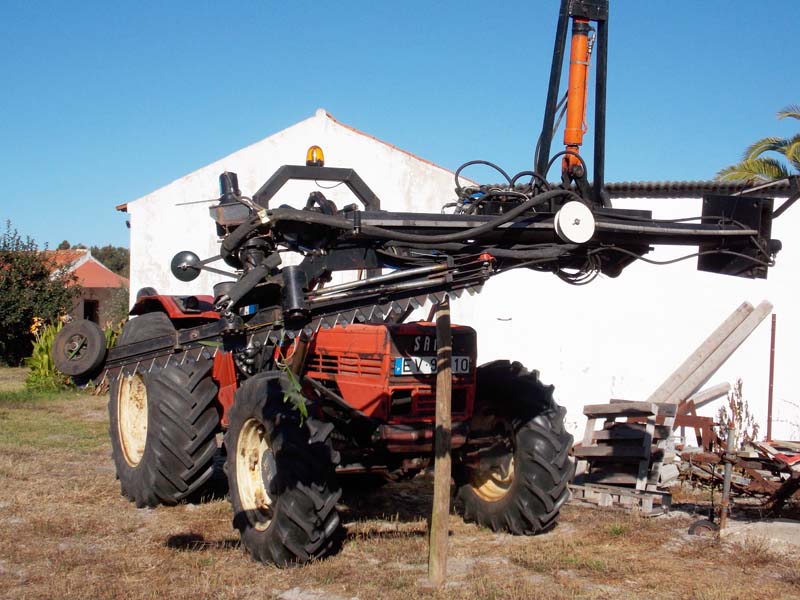
Hedgecutter project update 2020;
After a few years of use, things were getting a bit wonky and it's time for an update.
Also, the machine was very limited in it's cutting power and the blades would jamb too often.
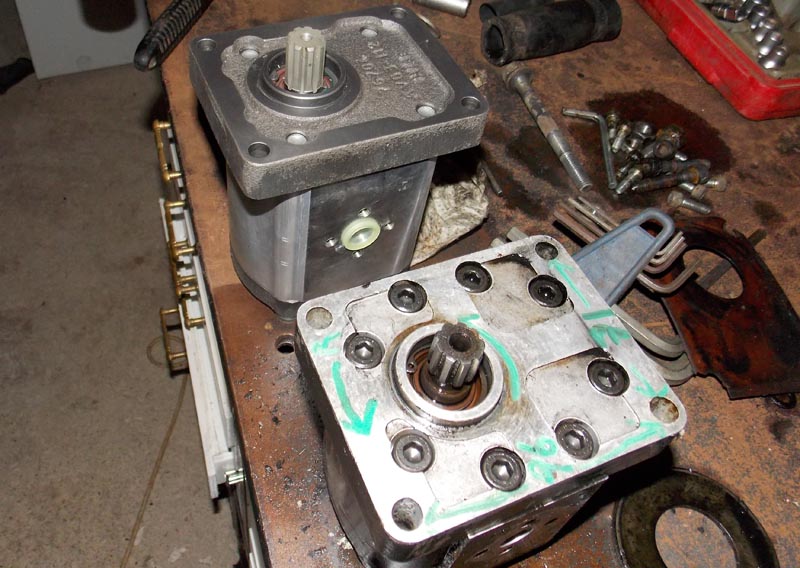
First, I replaced the hydraulic pump on the tractor with a new one with 50% more volume.
It was a lot of work to figure out the number of a bolt in replacement pump; 22.5cc Bosch / Rexroth number 0510725348
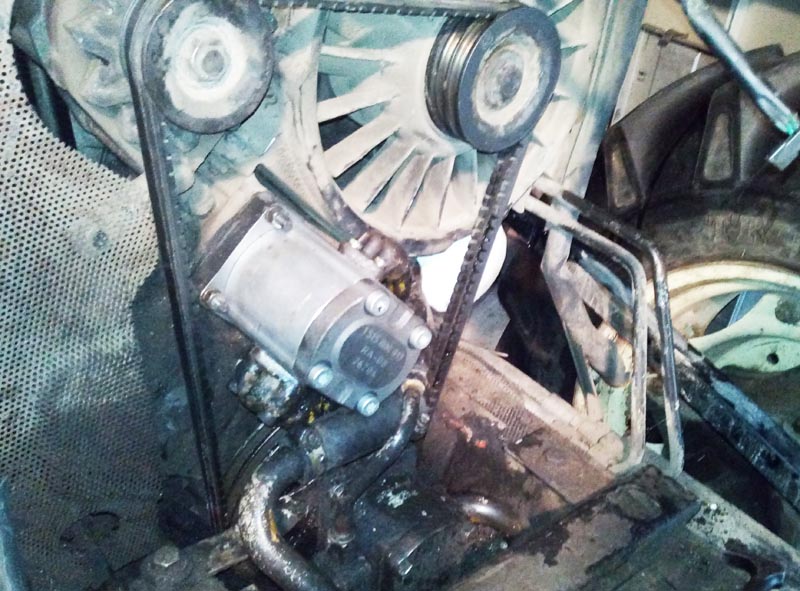
New belt, wider and rated for the load, instead of the old car engine timing belt. I've changed the ratio too, for more torque and less speed.

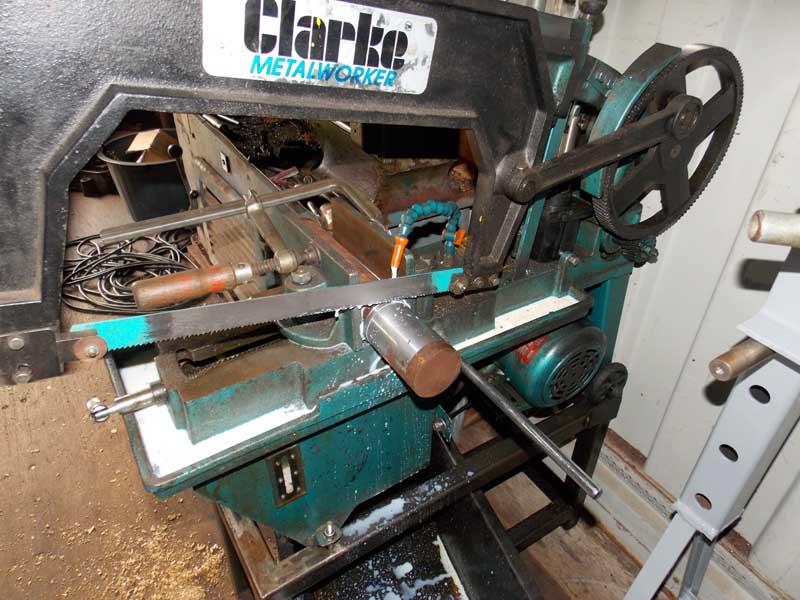
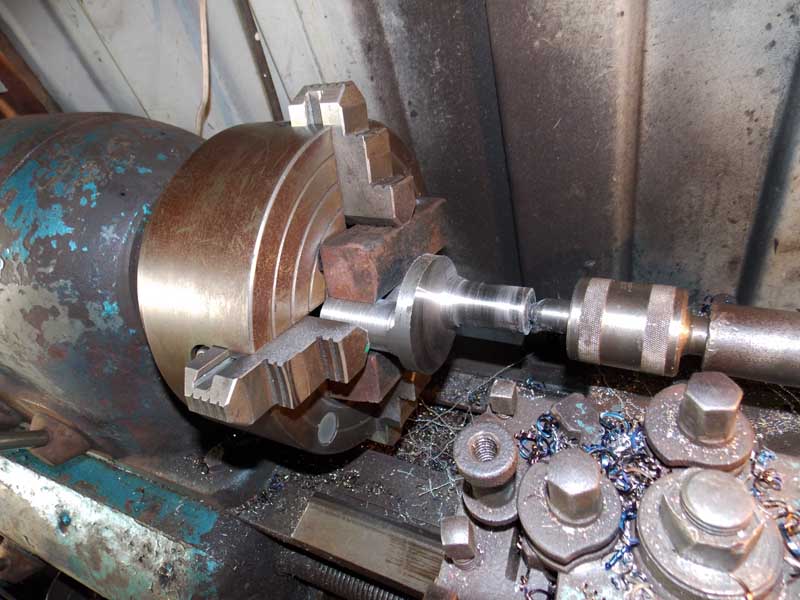
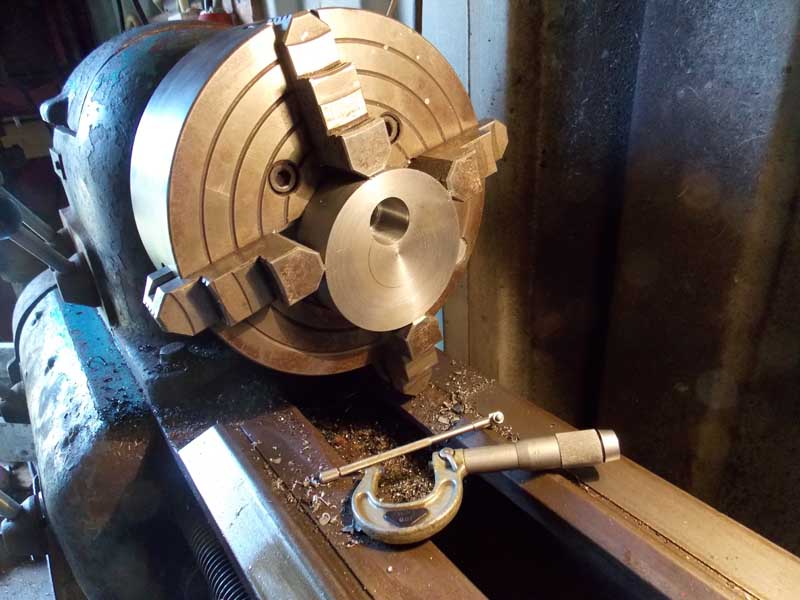
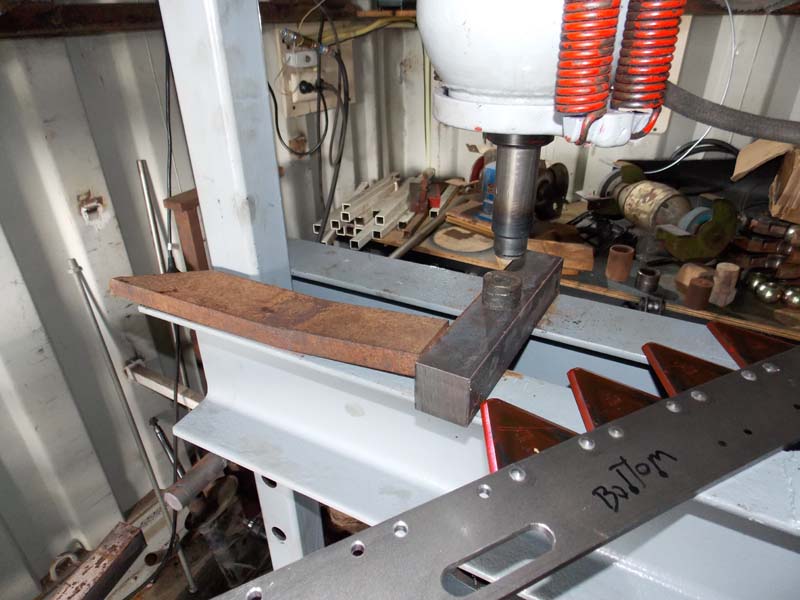
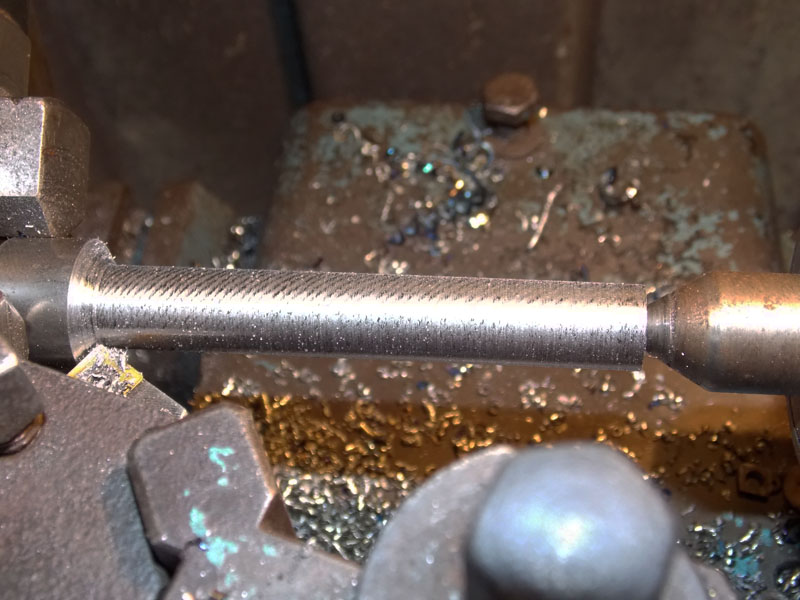
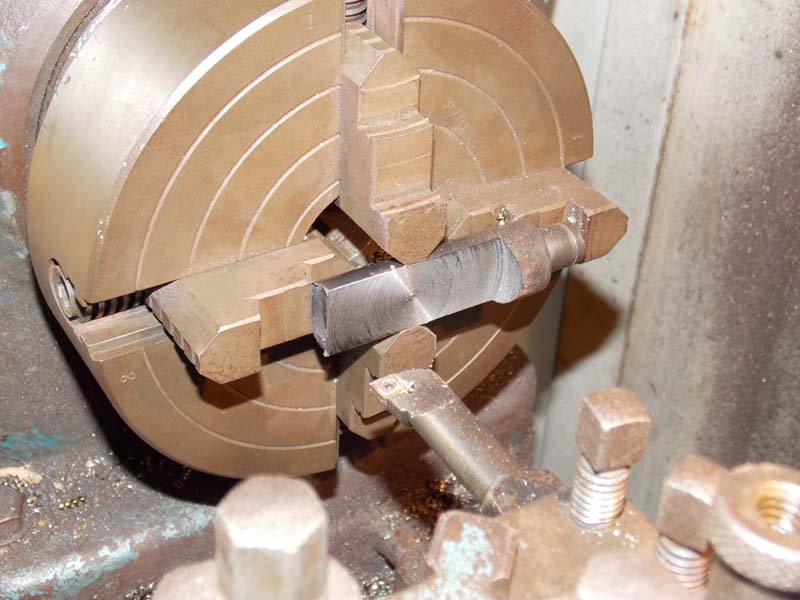
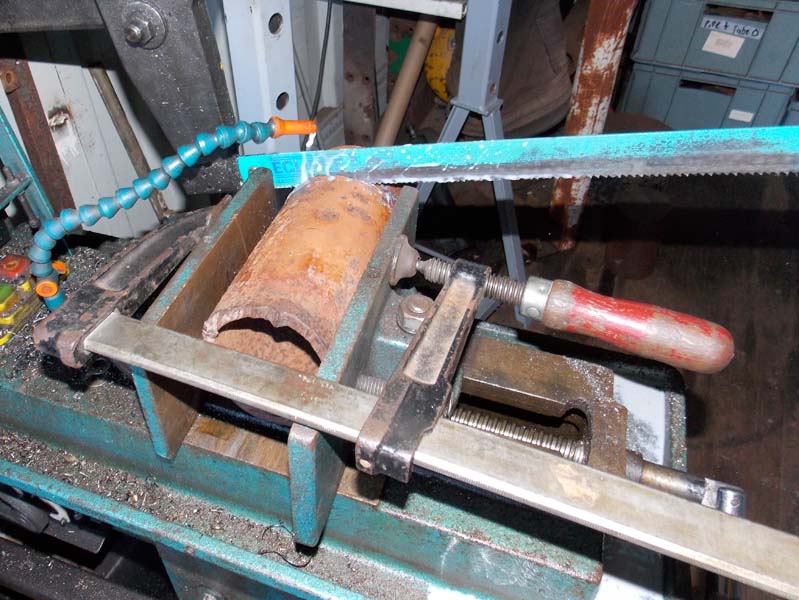
cutting stock for the new crankshaft.
marking
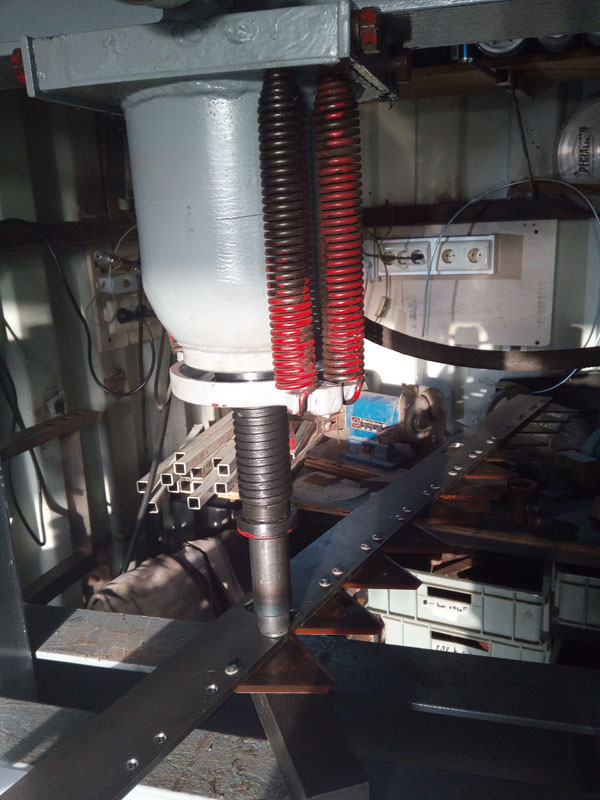
turned the solid rod into this;
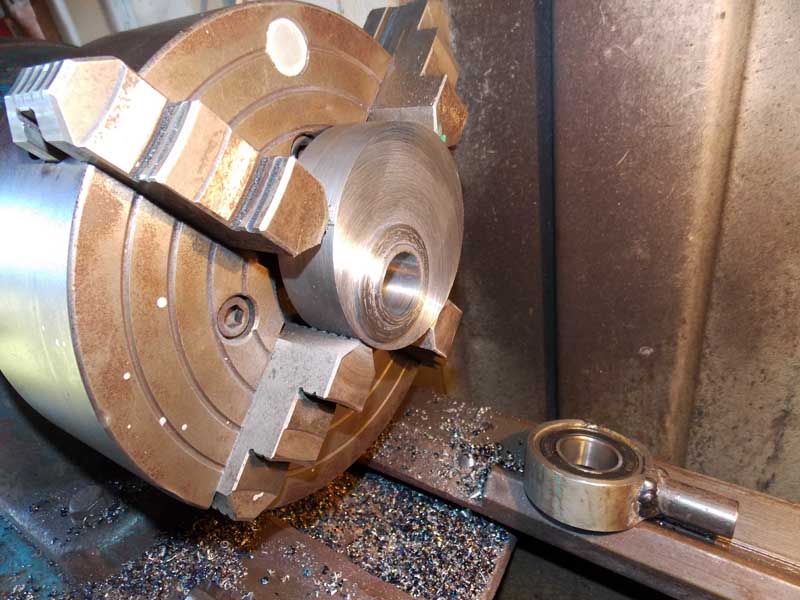
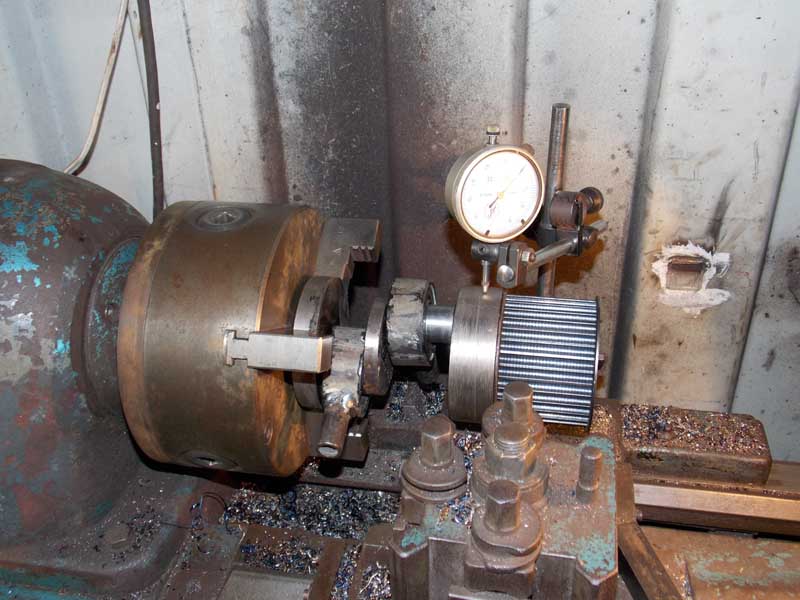
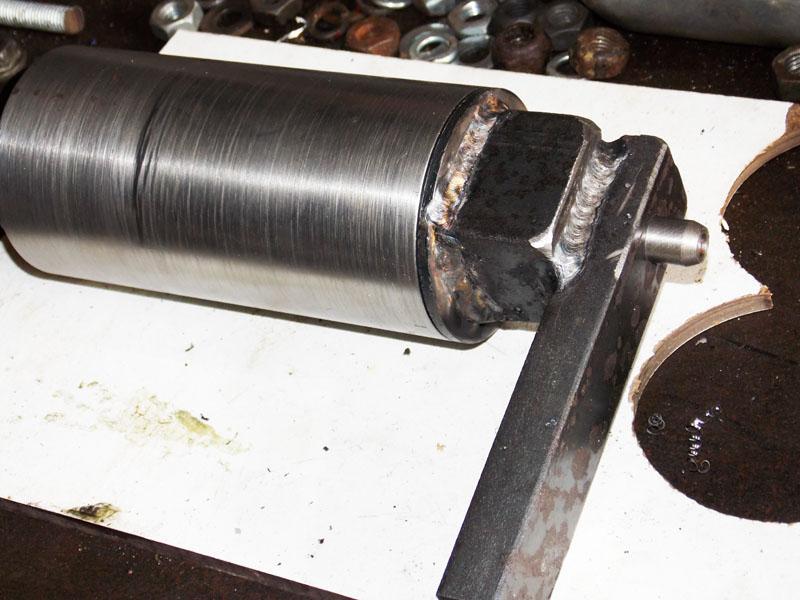
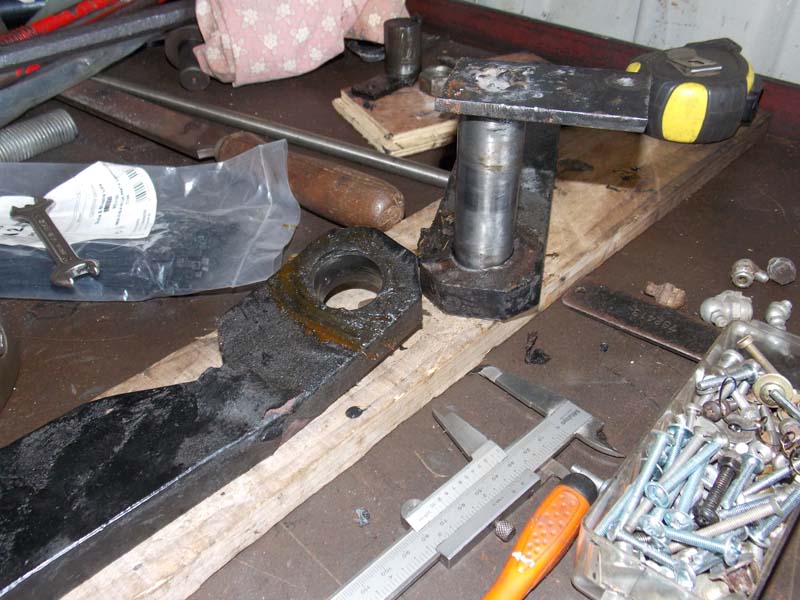
Old crank above, new below; the new 'rod' bearings are larger and orbital type, they're able to wobble so lineup is no longer essential. Since they're wider than the first ones, I needed a thinner crank center web. along with higher expected torque, I had to make it from solid,
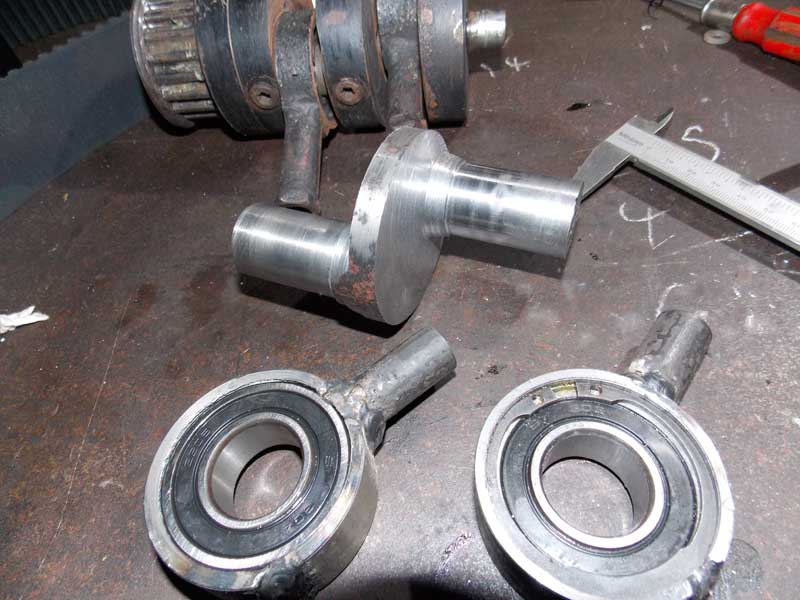
The end cap had enough metal for a larger bearing too.

I tried really hard to get the crank right; I didn't. the outer caps are slightly off dimension.
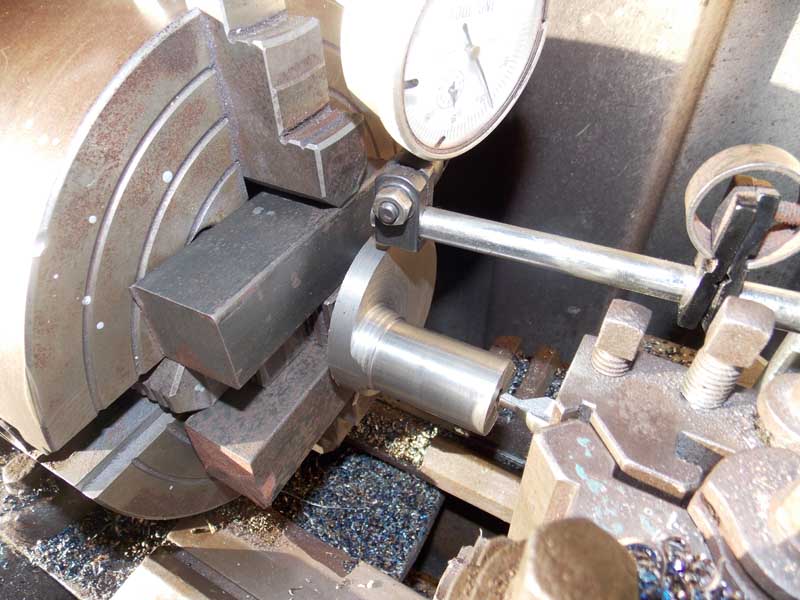
finding the center of a punch mark.
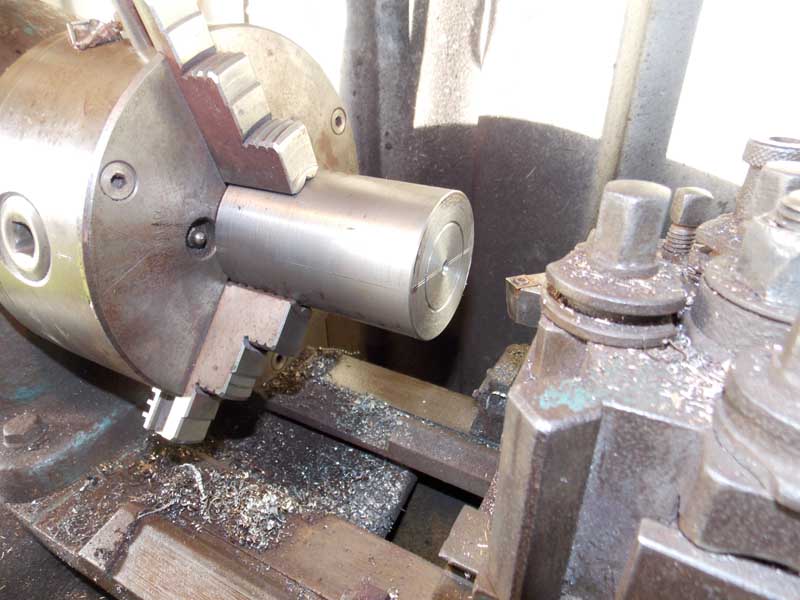
Boring
cut a little relief.
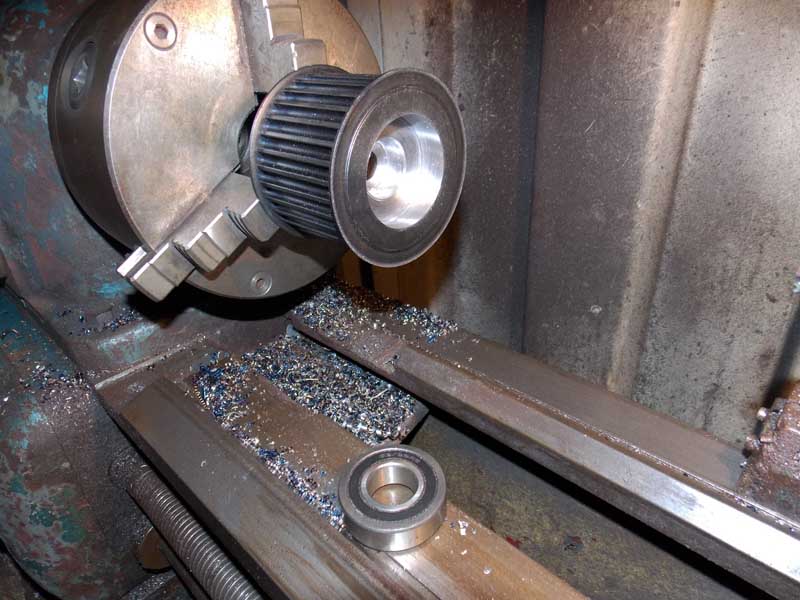
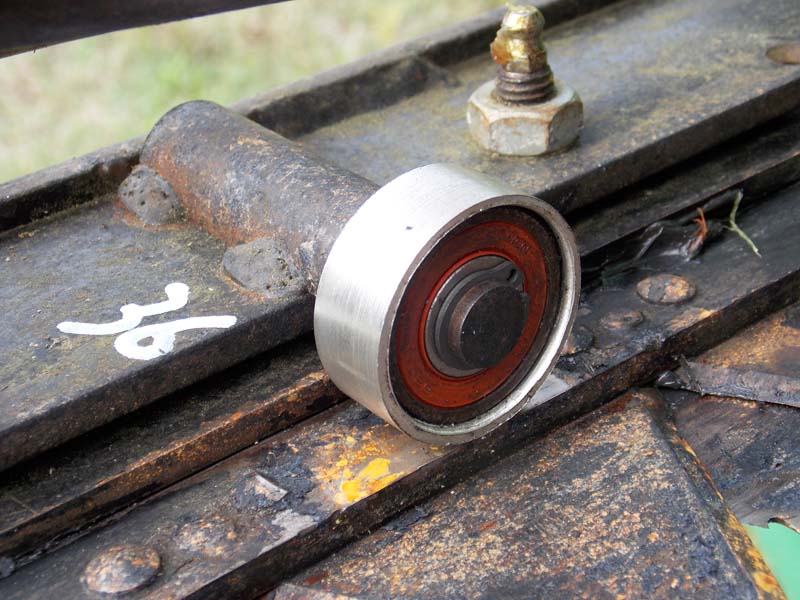
New pulley gets a bearing in the end.
getting things centered
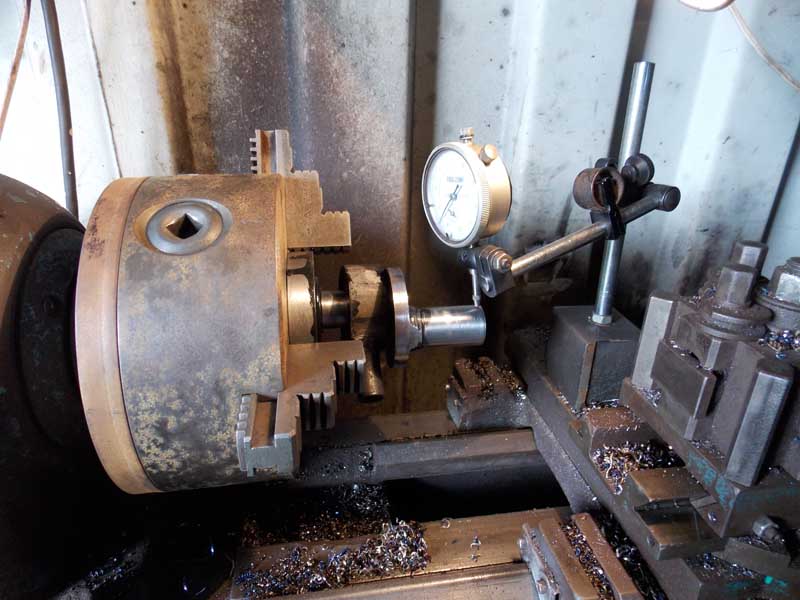
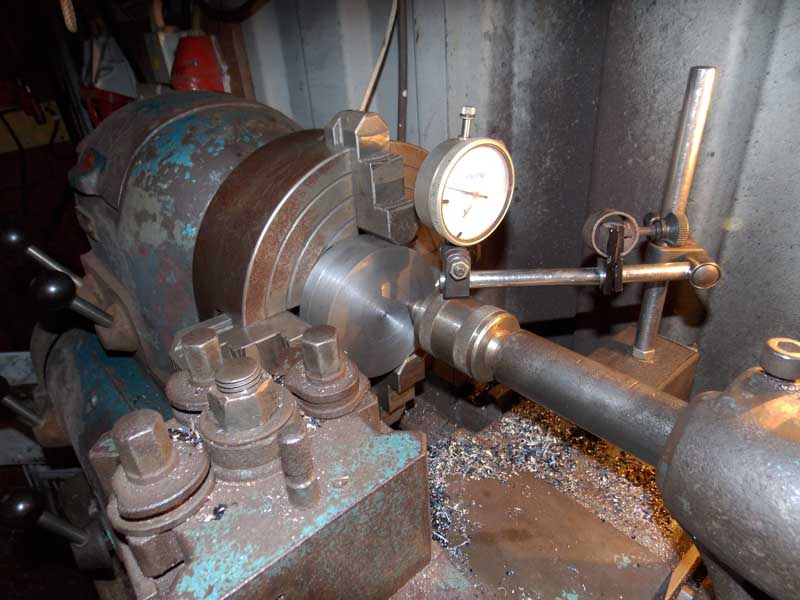
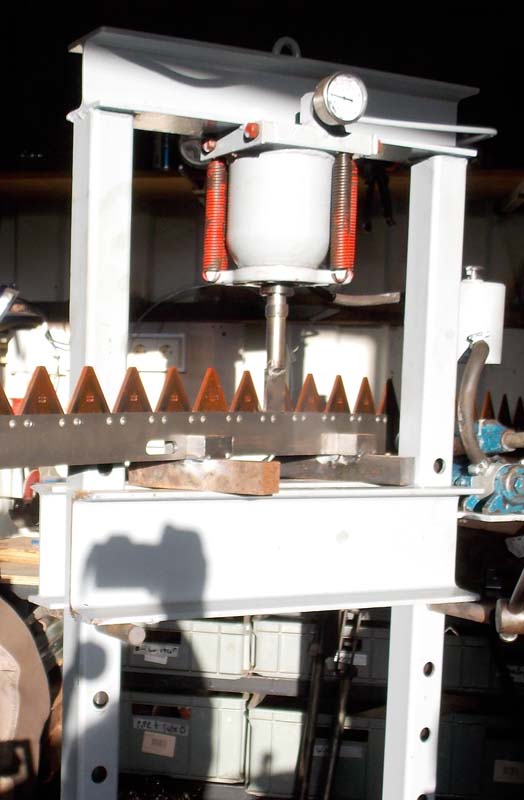
First pressing
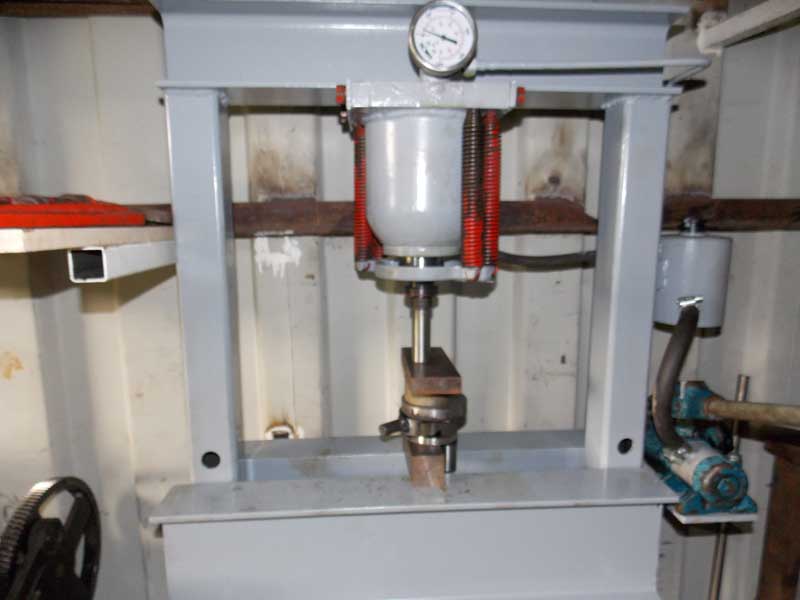
centering the next section;
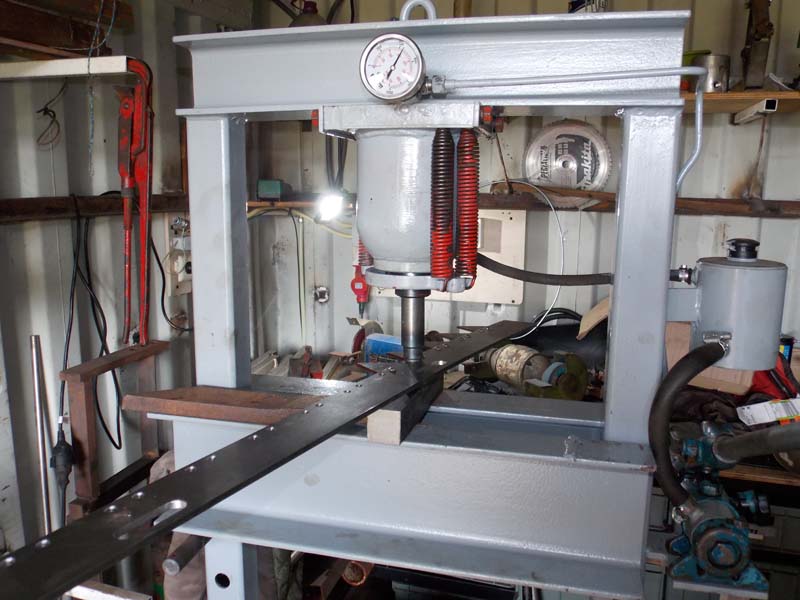
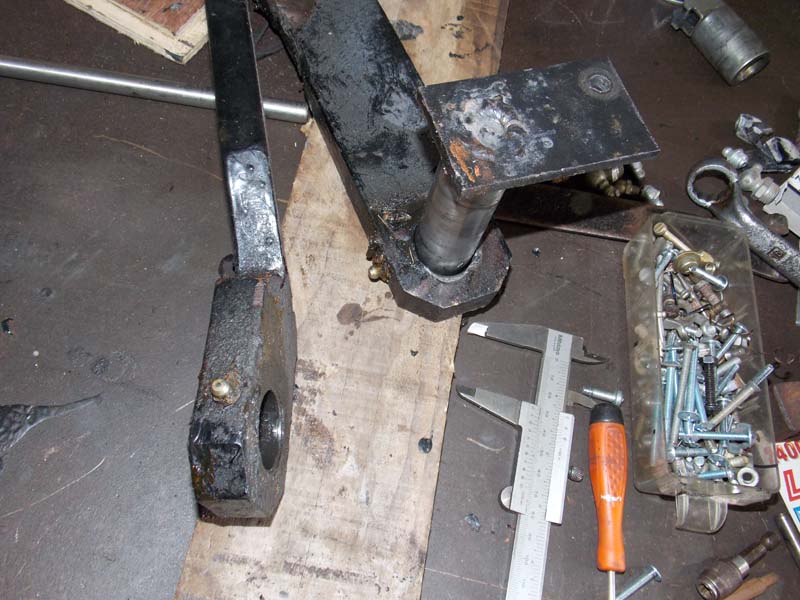
Final press of the new crankshaft;
The next new section is a rotator motor for the blade, to replace the overly complex system I made a few years ago, than now had multiple failures.
I found this little winch on ebay, made for an ATV or something. A tough little permanent magnet motor and reduction gear, and it's designed not to freewheel in either direction.
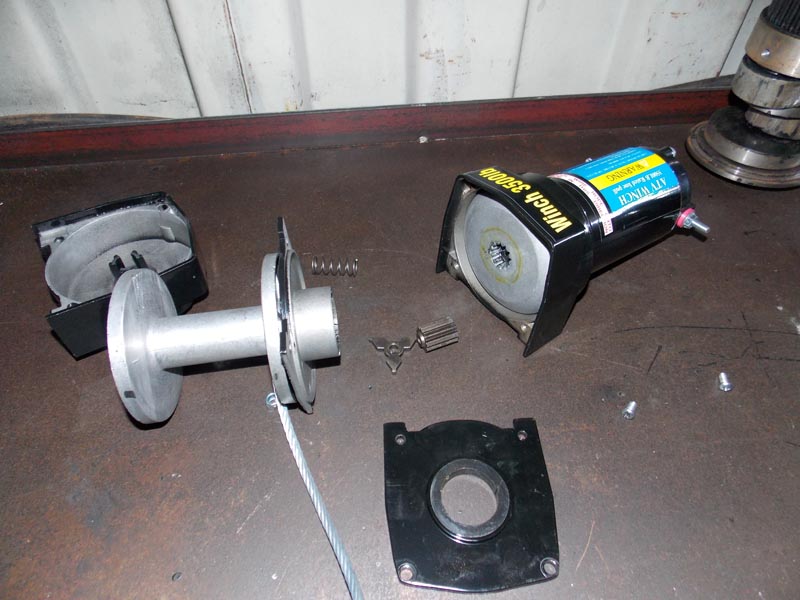
These 3:1 gears are from an old Ford escort transmission a friend gave me
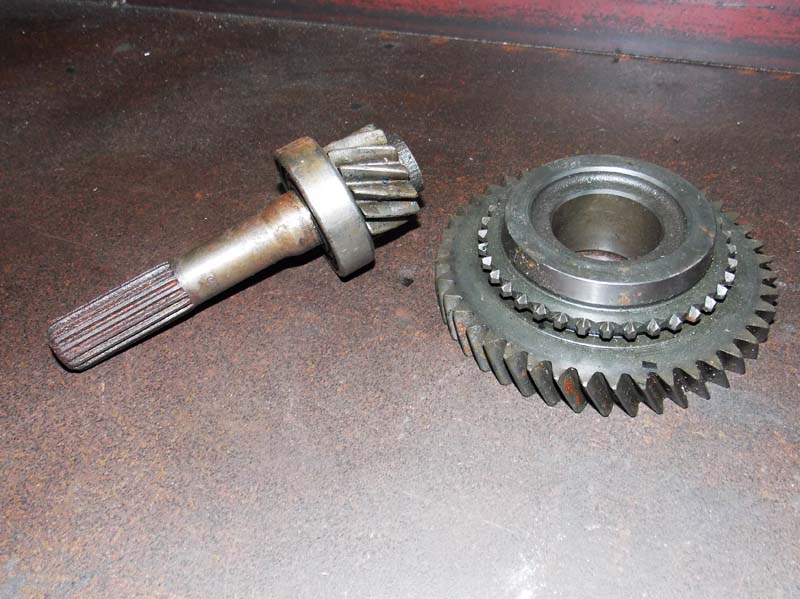
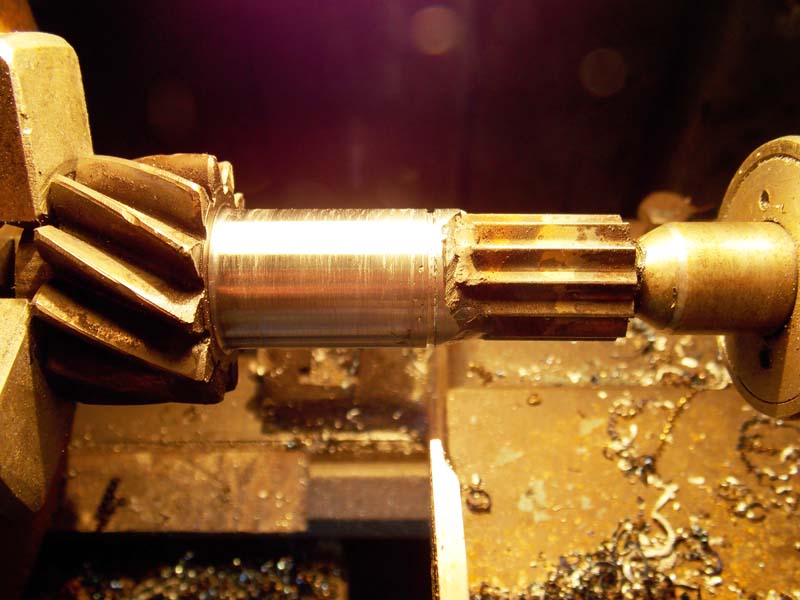
I welded the spline from the winch to the small gear from the car.

Then cut it down to a smooth rod for a bushing;
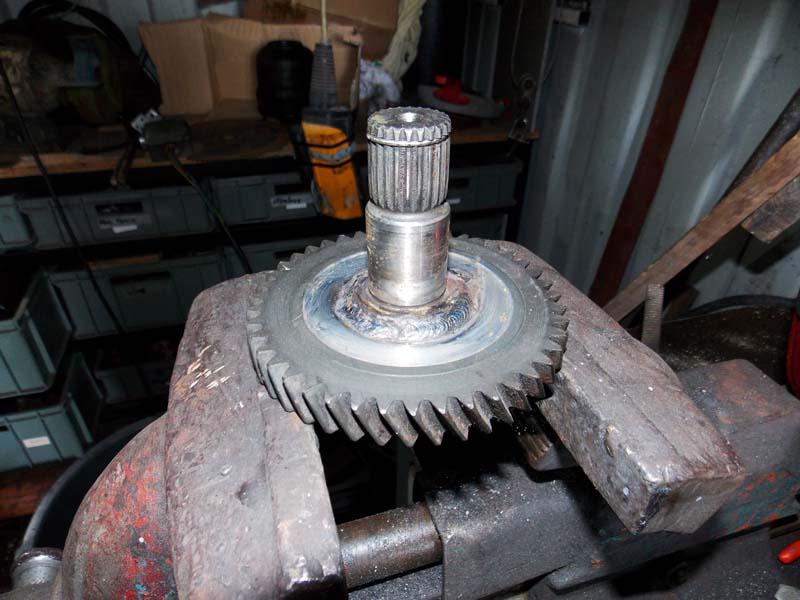
The larger gear is pressed and welded to another spine, this fits into the differential housing that I used for the first blade rotator mechanism.
Jumping ahead, here's the now rotator on the Hedgecutter. The reversible winch through the 3:1 reduction rotates the blade 180 degrees in about 4 seconds.
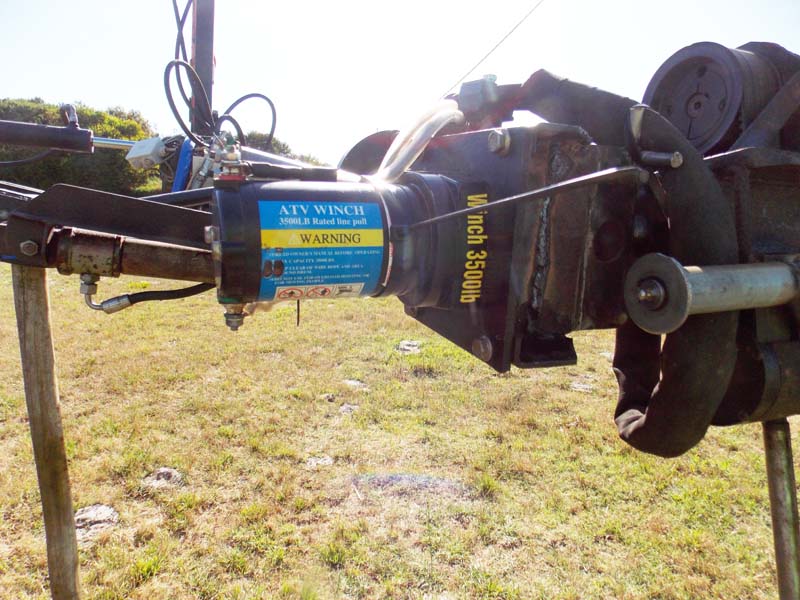
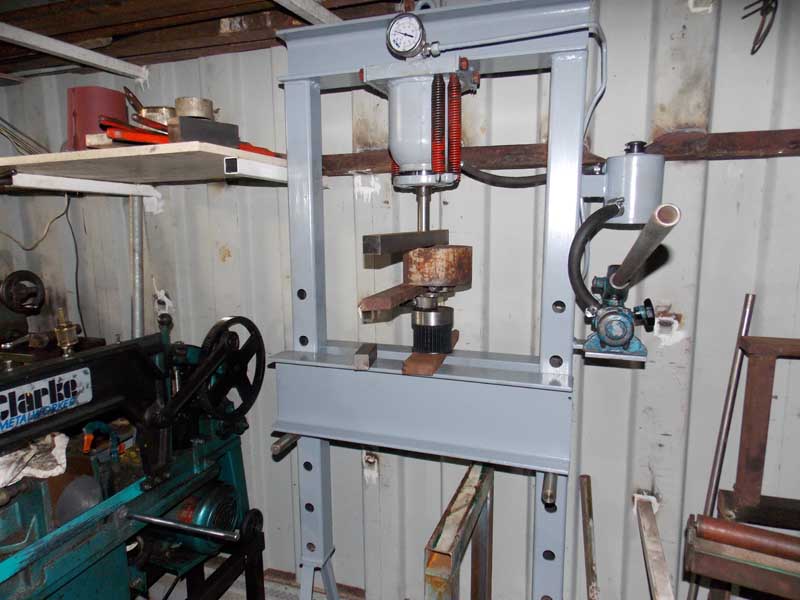
In this picture you can see the new rotator motor, also the upgraded larger hydraulic supply lines [that made a huge difference], and the tube rotation lock solenoid that I show lower down on this page. The new wide belt is there too, and on the very left, simple but effective roller hose guide.
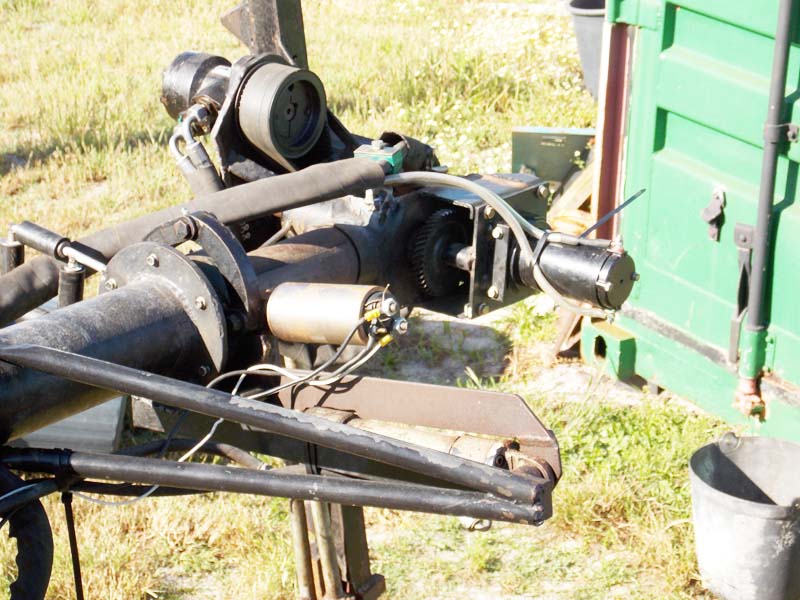
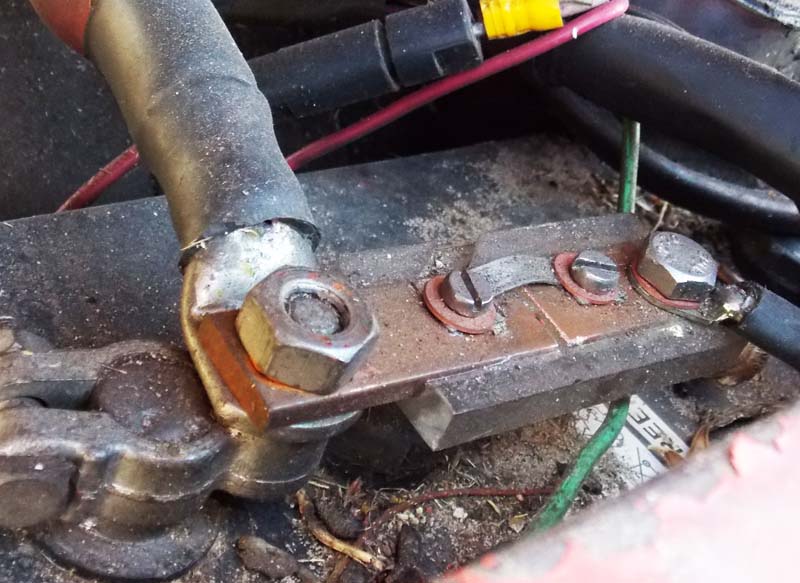
The motor needed a lot of cabling and a big fuse; I made the fuse holder from leftover Lexan and copper strip. The fuse itself is a Bosch thing I had.
So now with plenty of power up top, I have another component to fabricate.
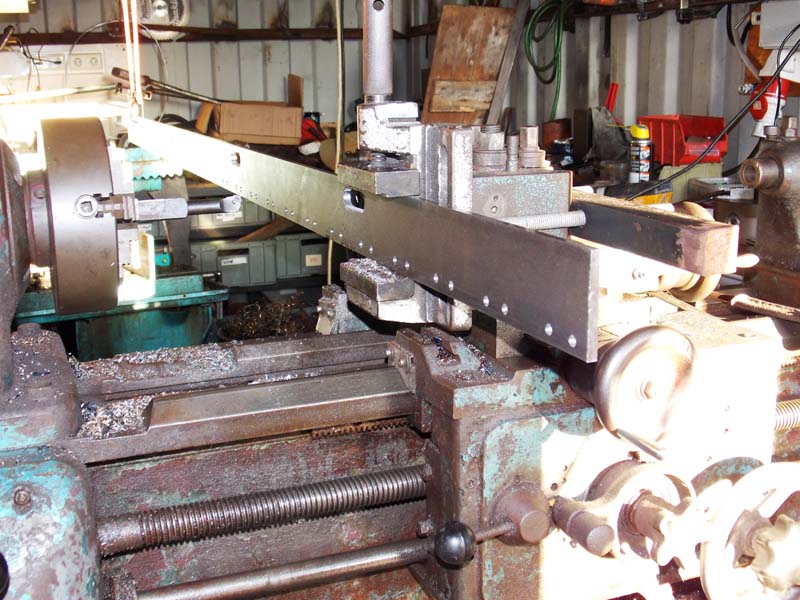
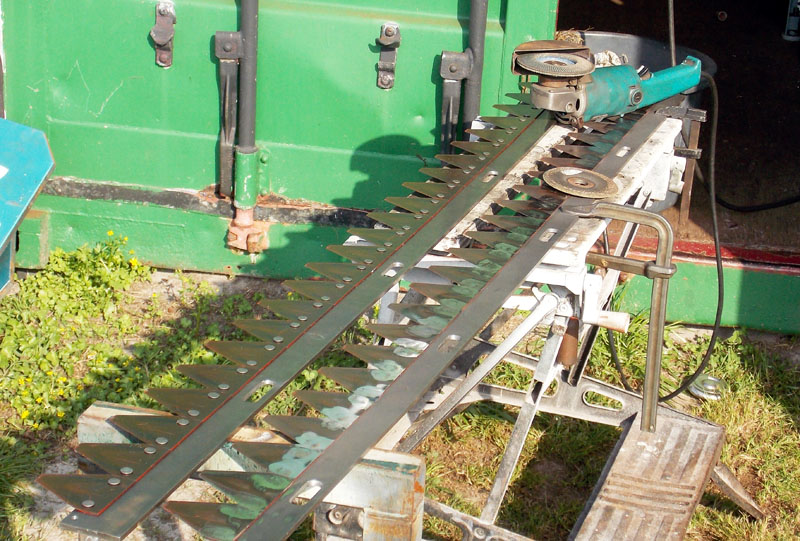
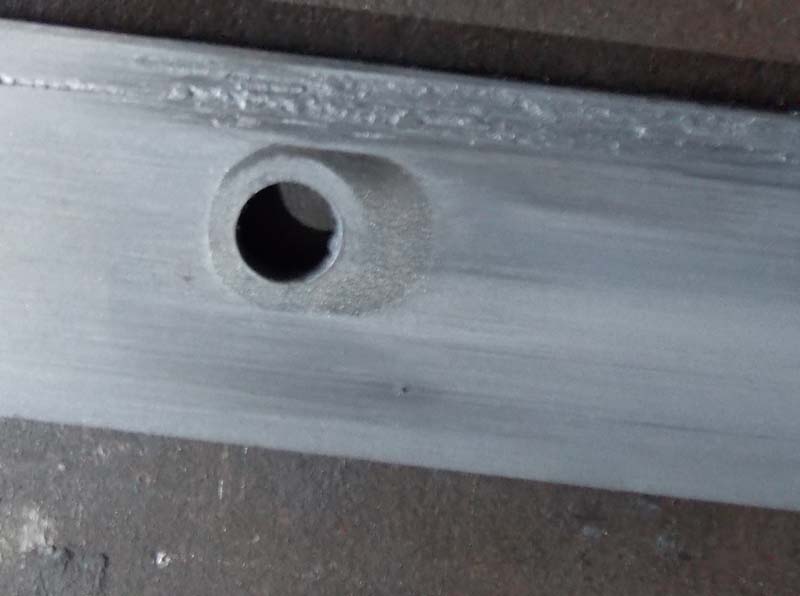
I wanted entirely new cutting blades, and the only way to get what I want is to make it from scratch. It took a long time to source this smooth flat steel strip. In this picture, I've drilled the rivet holes and I'm cutting the guide slots using my lathe as a mill. The bar is sticking out to the side and supported from above, clamped in place by a machine vise bolted to the tool post while the tool is in the lathe chuck.
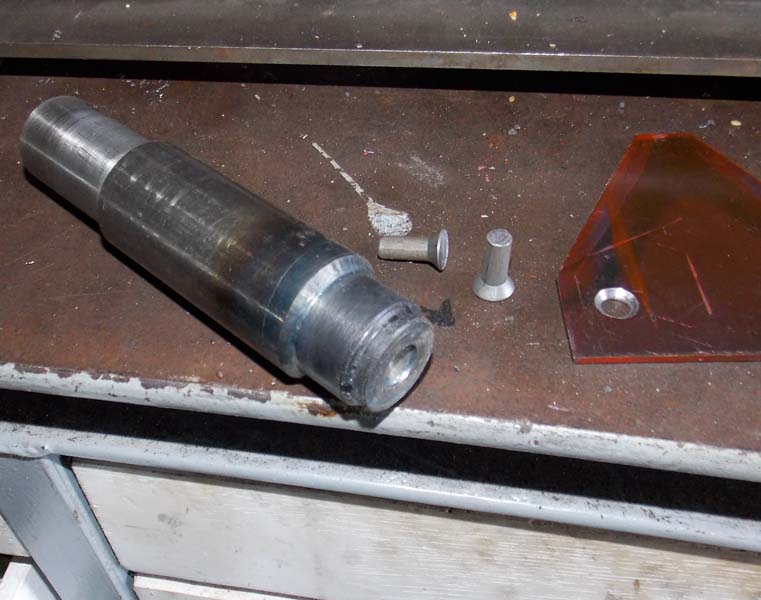
This is my rivet press tool, made to fit in my home made press. The working end is hardened by heating with a torch and quenching in water.
Close-up of a rivet head after pressing.
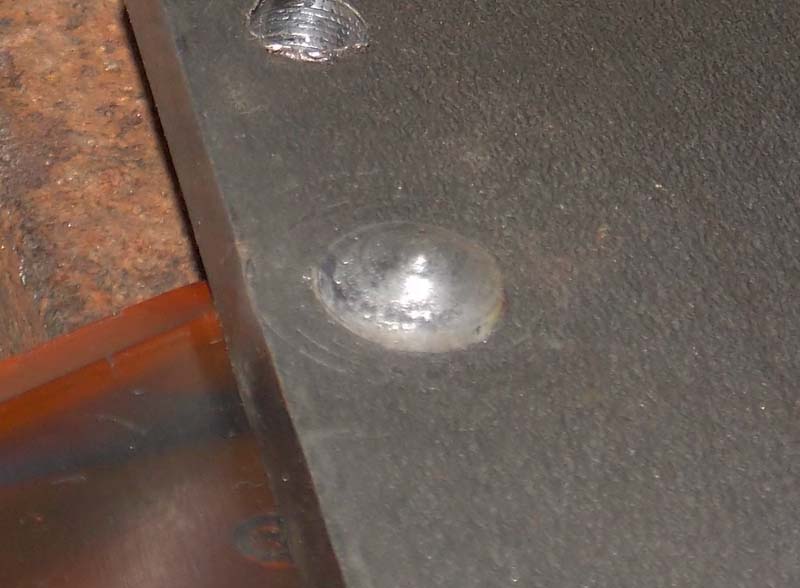
Another hard puck of steel is below as an anvil.
More than 100 rivets, this setup did the work pretty quick. They squeeze like marshmallows between the hardened rods, only around 10 tons and the soft rivets are like jelly.
In hindsight, the bar deforming is completely obvious, but it was totally unexpected. A new problem that needs solving.
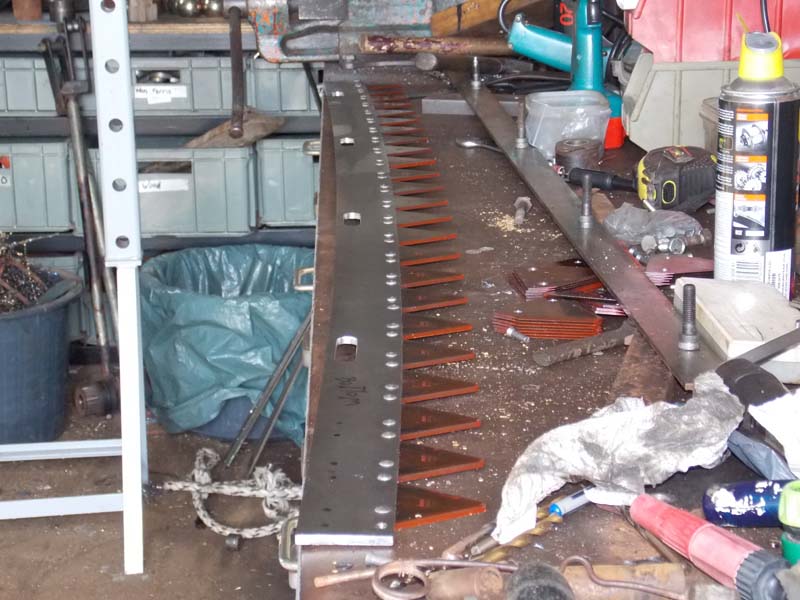
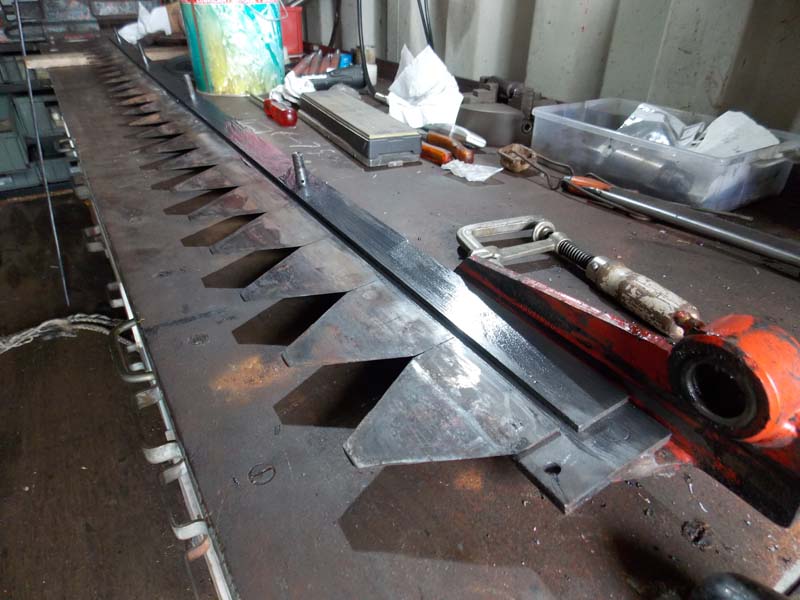
I made some jigs; 2 to hold the bar vertical, and 1 to reach past the blades to push the bar. This worked well, and after an hour or so the 2 blade bars were straight enough to assemble.
Another shot of rivet pressing;
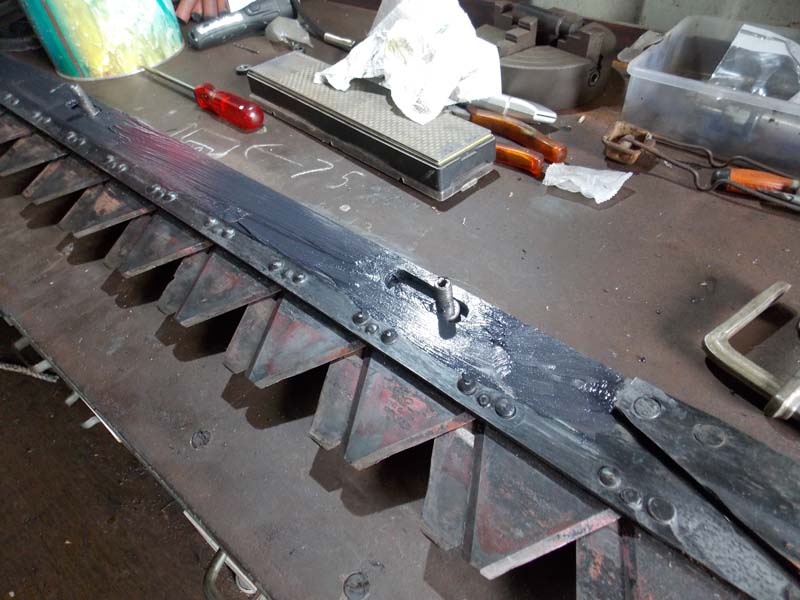
After pressing the rivets and straightening the bars, I ground the beveled sides down below flush, because the blades will be sliding against each other.
First assembly of the blade pack.
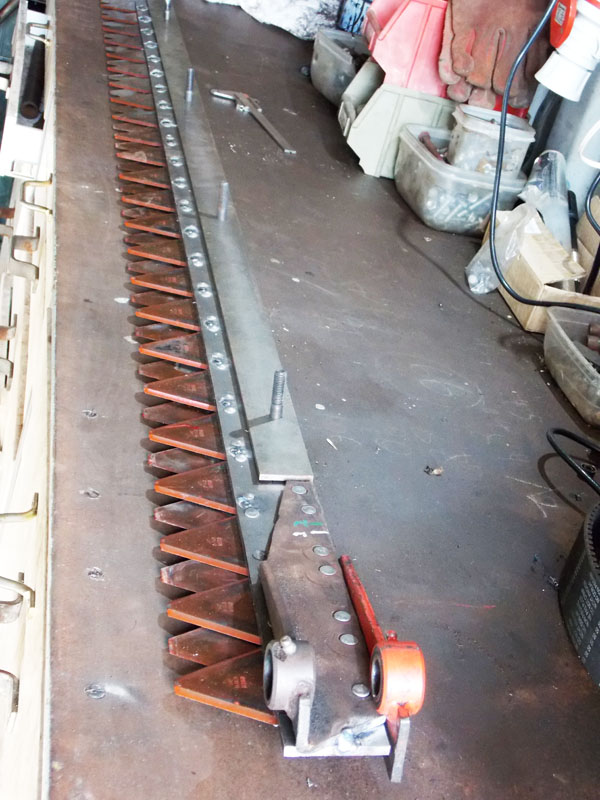
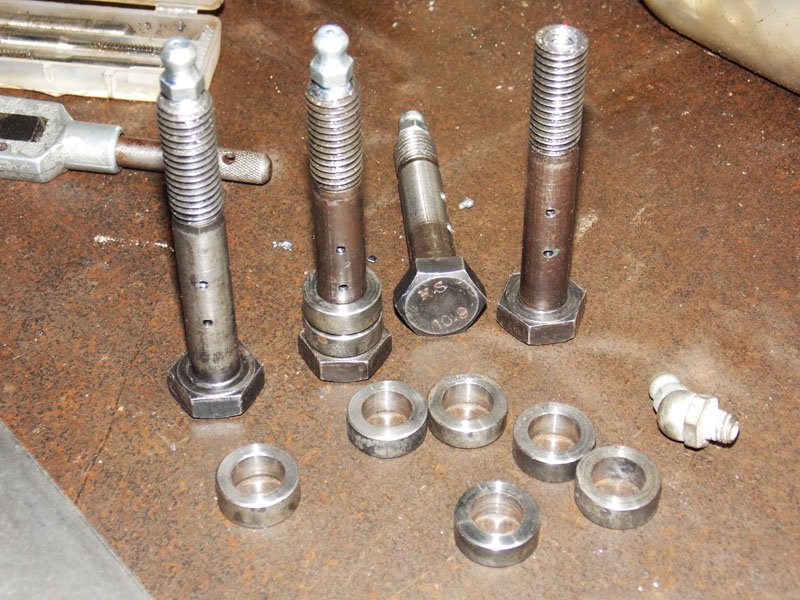
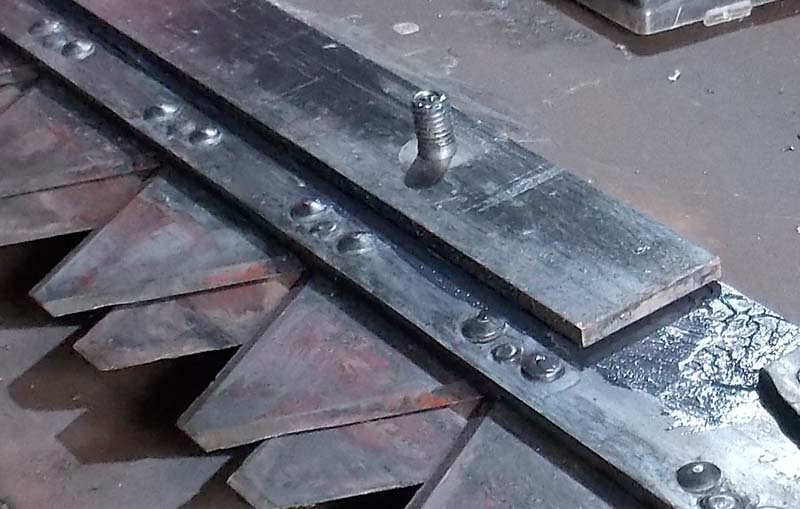
all components laid out on the bench; top, bottom, and center strips. Bolts and roller rings [if you look close].
I made the rings from high carbon rod and hardened them. they ride on the bolts in the machined slots in the cutter bars.
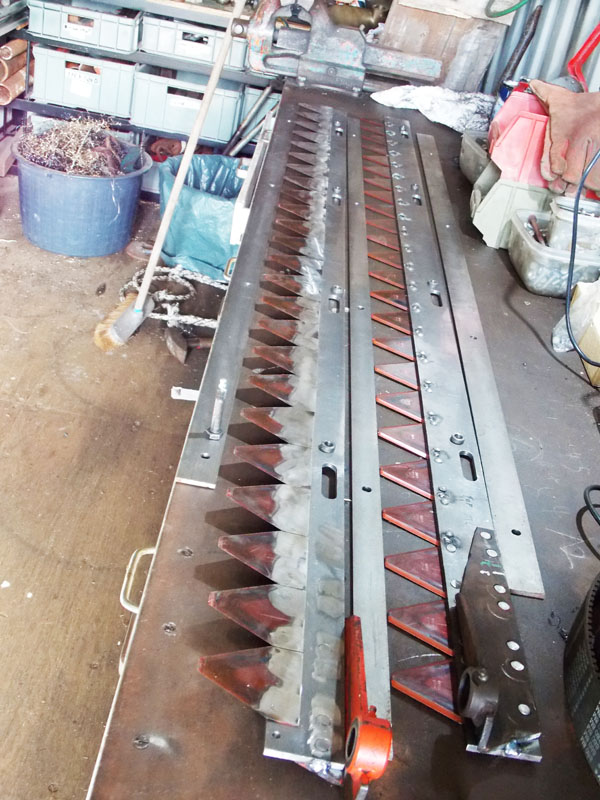
Fitting the new blade pack into the old cassette of the hedge cutter. The keyholes allow the pack to go in with the bolts, then lock in.

I drilled and tapped the mounting bolts for zerk grease fittings.
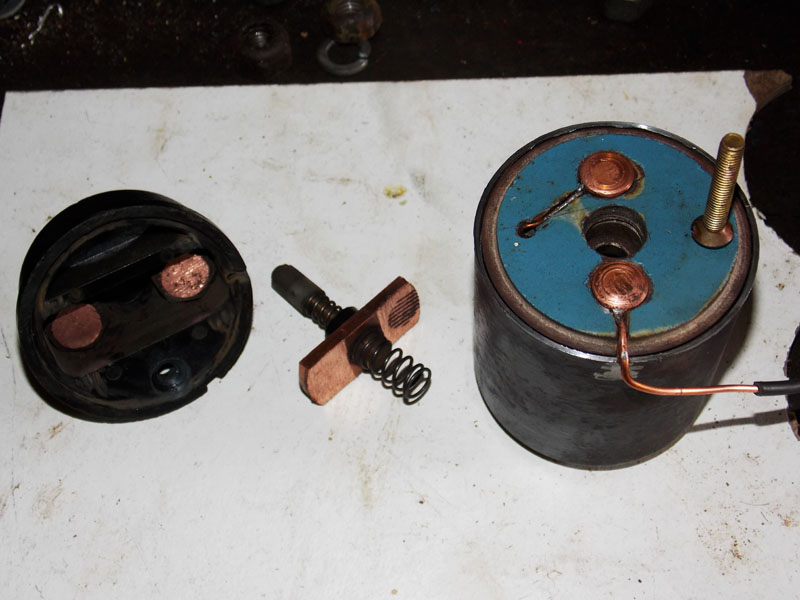
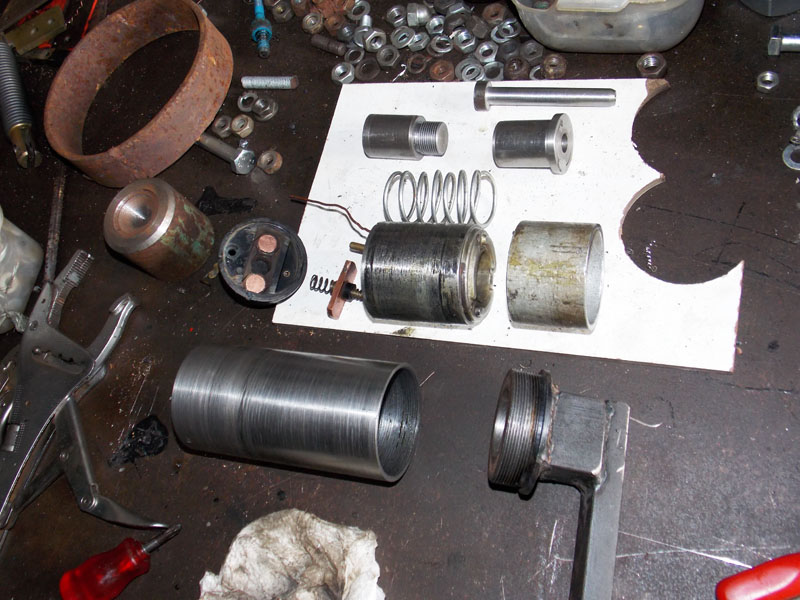
The next component is a whole invention of its own. A spring loaded lock pin with electric drawback solenoid.
I need this because of changes to the hydraulics I made left the tube rotation without a lock. I considered making a hydraulic system but the leftover starter solenoid was on the shelf looking at me.
The first thing was to change the internal wiring; starter solenoids have 2 coils, and the main one is supposed to be grounded through the starter motor windings. It has to disconnect when the solenoid is drawn back, or it will burn out. So I made this switch plate.
The cap of the enclosure. Made from scratch.
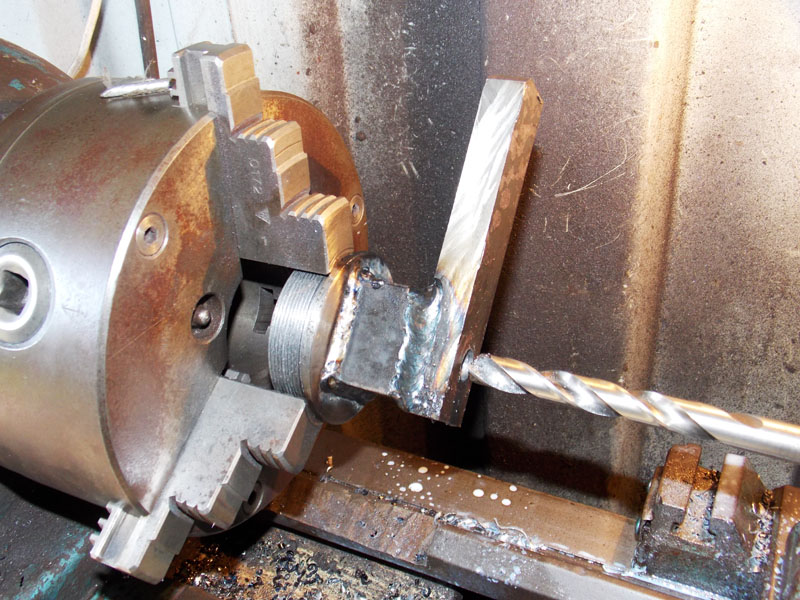
Had some trouble with the lathe; This pattern was caused by over tight head bearings.
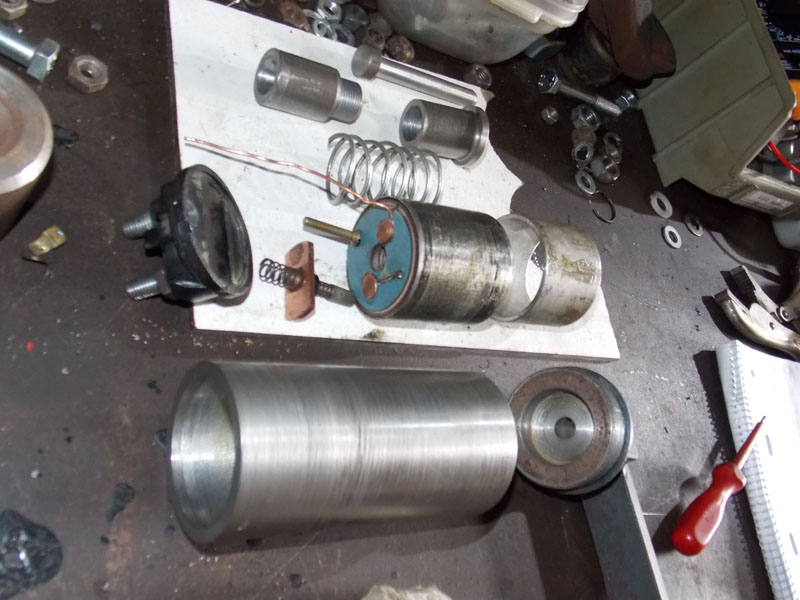
Exploded view of the electric lock parts. At the top is the lock pin that will extend into the Hedgecutter main tube.
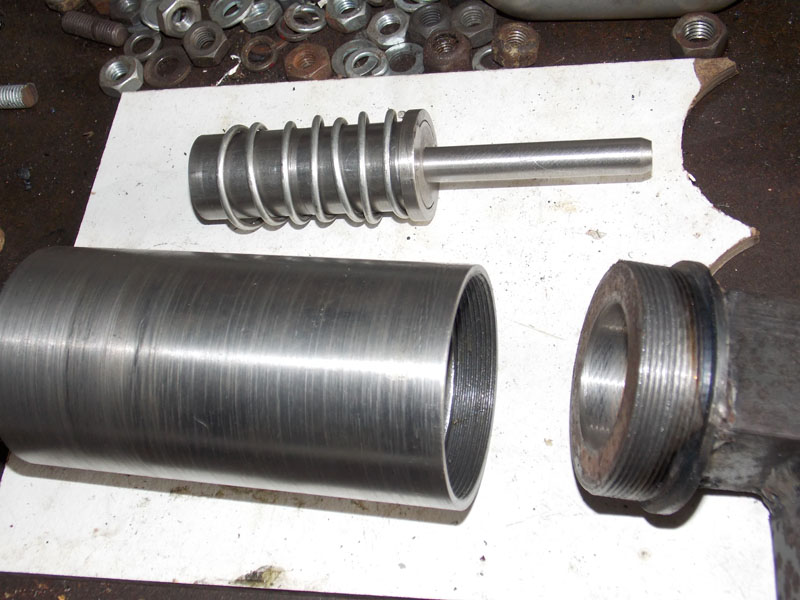
next is the 2 halves of the piston, which screw together with the lock pin between them. It's made loose, so the piston acts as a slide hammer to pull it out when it's pinched.
I had to make the main spring; yes, it's ugly. but it works.
Below that is the used starter solenoid [from my tractor], switch plate and shim collar.
At the bottom is the container and cap that will be welded to the machine.
Another angle.
partly assembled, the solenoid piston and spring. You can see some cutting pattern in the bore of the cap from my lathe head bearing problem.
The lock pin and piston parts are hardened and tempered.
Everything got a good coating of grease before final assembly of course.
All screwed together with the lock pin protruding. When energized, about 80 watts will draw back the piston rapidly, which strikes the shoulder of the lock pin and pulls it out, releasing the main mounting tube for rotation.
When the piston is all the way back, it releases the switch that energizes the powerful pull coil but the hold coil remains energized. The other side of the switch plate has the old contacts for the starter motor, and that's now used for the hydraulic solenoid, so only after this gizmo has done its thing, the hydraulic cylinder is pressurized and the tube can rotate.
The trouble with this sort of invention is that it's a lot of work [I didn't spend any money for it at least], and there's no way to know if it will do the job.
It does; not perfectly, but it works. sometimes I have to hit the button a few times to hammer the lock pin back.
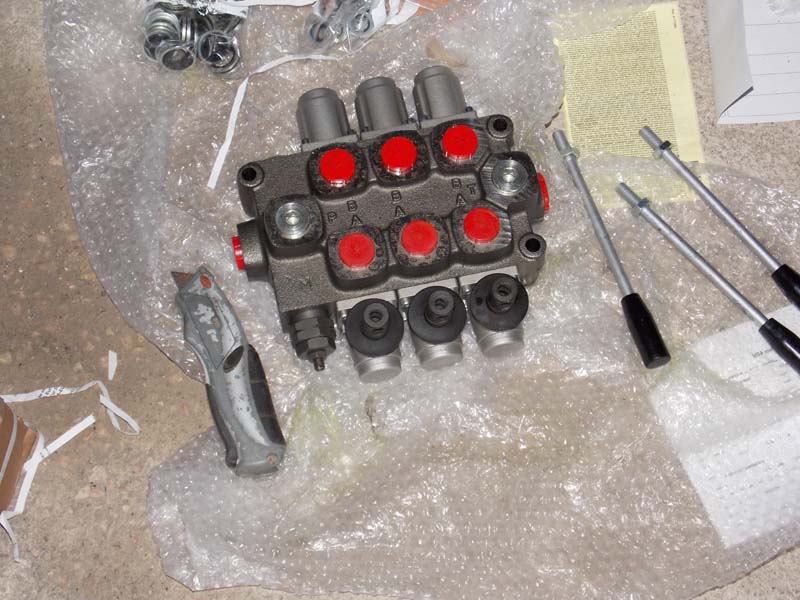
The hydraulic pressure has always been really high while the machine was working, and I hadn't realized that most of that was back pressure due to restrictions in the tubes and valves. The tractor has been fight itself. Part of major upgrades is this new valve block from Flowfit [UK] for the front end loader and hedge cutter, it's rated for a higher flow. I'll make a separate page for the tractor hydraulic upgrades.
The new blades, ratios, and hydraulics worked great; cutting power is 3-4x better. For about 5 hours. then it stopped, the blades stuck together.
Disassembly revealed heavy galling, the grease had escaped and metal-on-metal had occurred.
I concluded that heavy pressure was caused by debris between the blades forcing them apart, put high loads against the bolts and pressed the backs of the blade bars together.
I did some careful grinding with a flexible pad, then reassembled the blade pack with grinding paste. After running for about 10 minutes at low speed, I took it apart again, and reassembled with grease. Lesson; inject grease through the mounting bolt zerk fittings after every 3 hours, with the blades engaged so the grease gets down along the flats.
Lower blade and 4mm center shim strip
Upper blade added, and the bearing rings in the slots.
Top strip closes it up.
Next is to add pressure wheels to the outside. Just 8 of them, each requiring a mount, a bearing, and a wheel.
The ends are hardened and tempered, the body is mild steel.
Wheels and bearings. I made the wheels from delron rod, it was fast work.

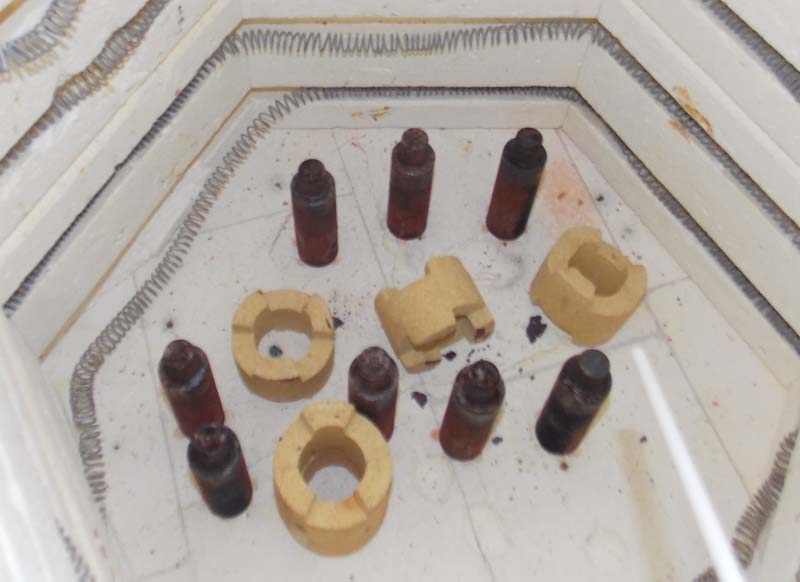
Tempering the axles in the ceramic oven, 500c.
The ends were hardened by heating with a torch until orange, then dropping into a bucket of water. This second heating and cooling eases the hardness ["tempering"], so they won't be too brittle.
The blade with plastic wheels to take the pressure off the flat bars during cutting.

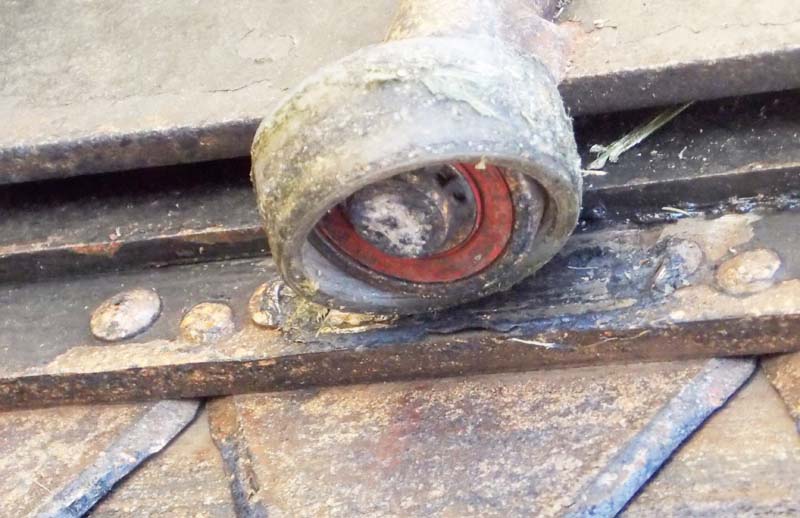
Oops, another problem. This big 30mm pivot pin slid out of place, bending the solid steel guide arm for the boom swingover.
The movement that swings the whole machine from right to left to cut on the other side.
I seem to have forgotten to take a picture after I straightened it. never mind, just imagine it straight. I added a bolt to prevent this from happening again.
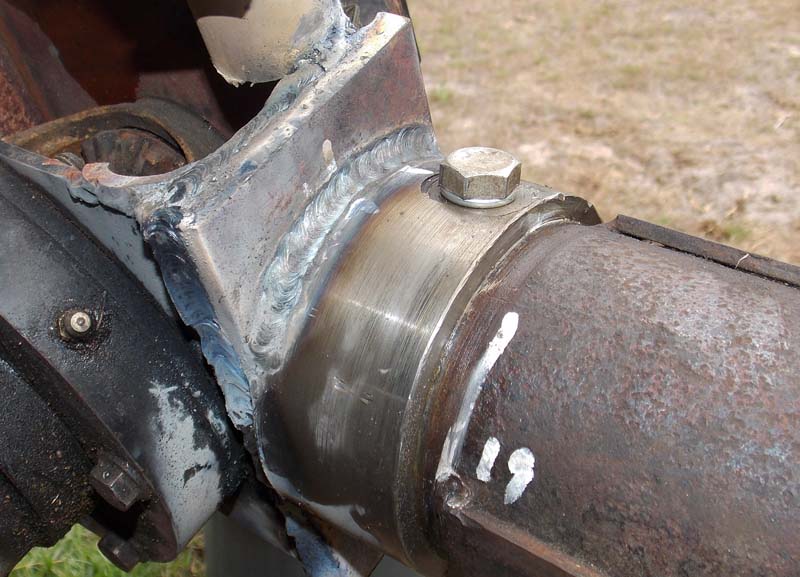
another day, another failure! this collar that's been doing the job for 6 years just stopped doing the job.
The whole cutting head is hanging by a little strip of bent collar.
I thought I could just pound it back and weld it up, but this part needs a new part.

I have a nice piece of old thick steel pipe from a scrapyard.
After turning to size, and adding a 10mm thick backing plate, we're back in action, ready to finish cutting the hedge.
I added this experimental end wheel; when cutting vertical, the wheel rolls along the ground and prevents the blade from getting stuck into the dirt. Also might be useful for getting around solid objects when cutting horizontal.
I think I like it, it will probably stay.

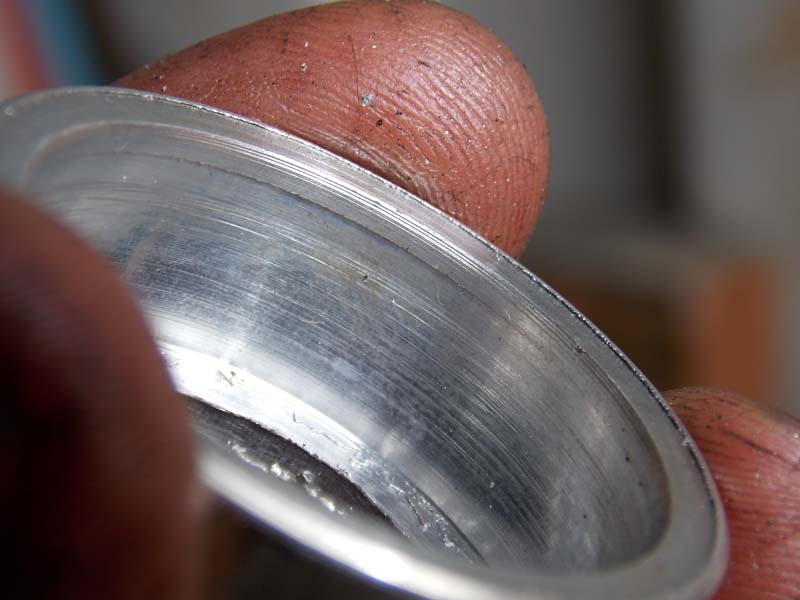
Those plastic wheels didn't last long. I thought the pressure on them was too high, but now I think they were hitting those rivet heads.
Anyway, I made new aluminum wheels that press over the bearings, and they're holding so far.
That's as far as I've gotten as of September 2020. the machine works well now, really strong and will cut through 25mm [1"] thick branches.