
Front end loader rebuild, with a couple of cheap boring ideas;
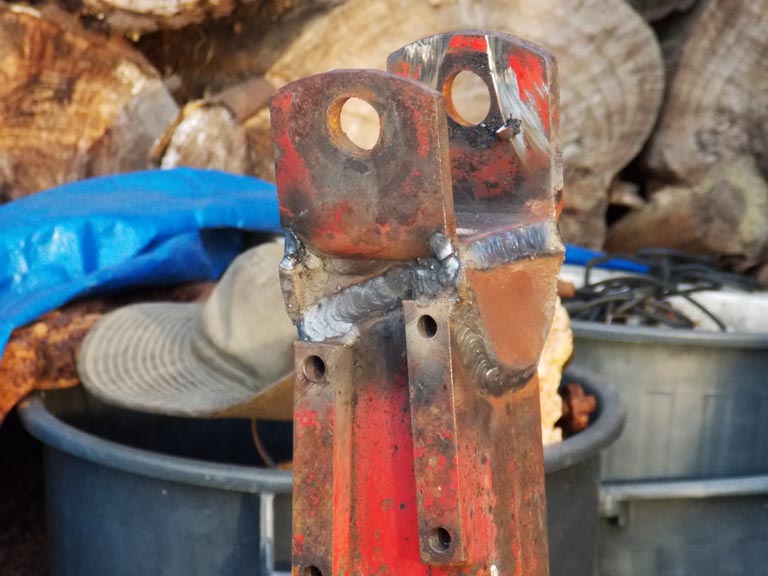
When one of the main uprights on my tractor's FEL cracked, I decided it was time to repair the worn out pivots and pins too.
Started by [obviously] dismounting, then welded up the crack and added some reinforcing plates.
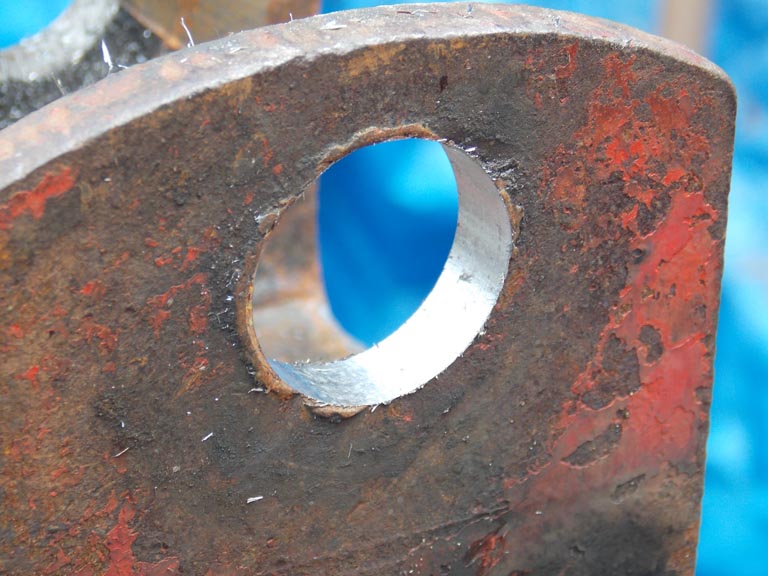
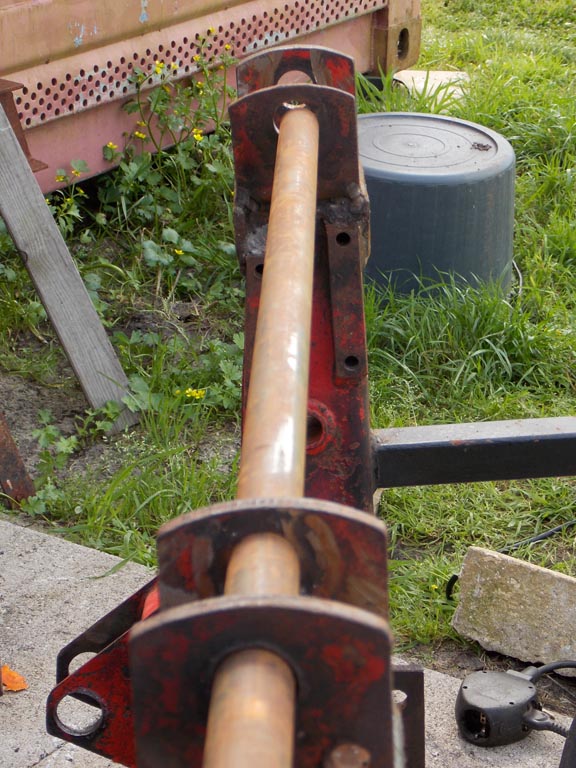
Now I need to re cut the pivot holes; they were once 25mm, or maybe 1", but now they're 28 x 26mm eggs.
I want the holes 30.1 - 30.3mm, round, and all in line. I'm sure there's a machine for that, but I don't have one.
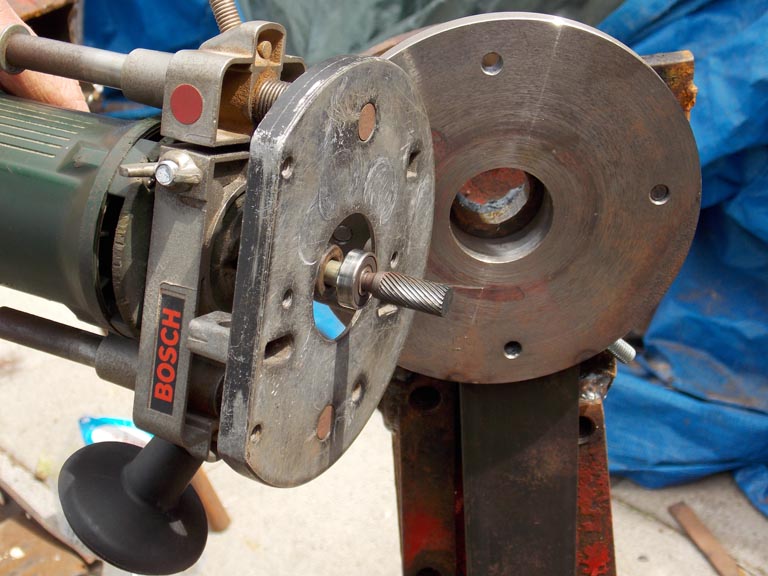
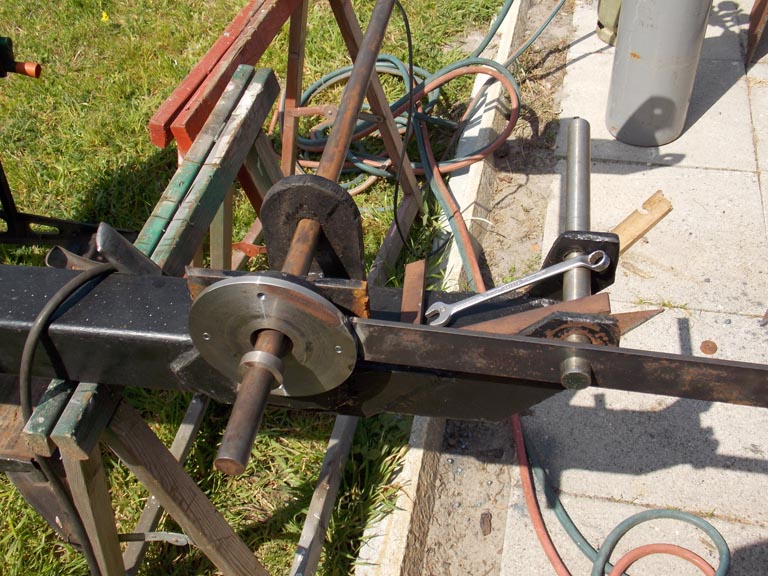
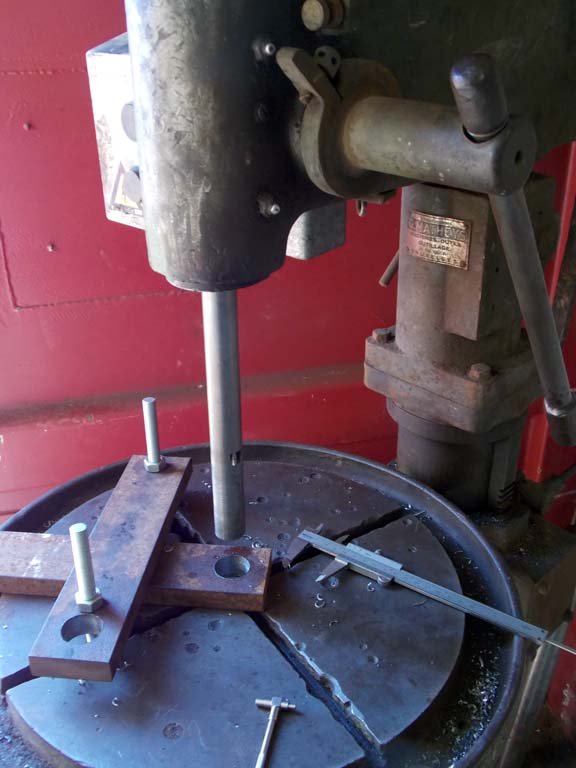
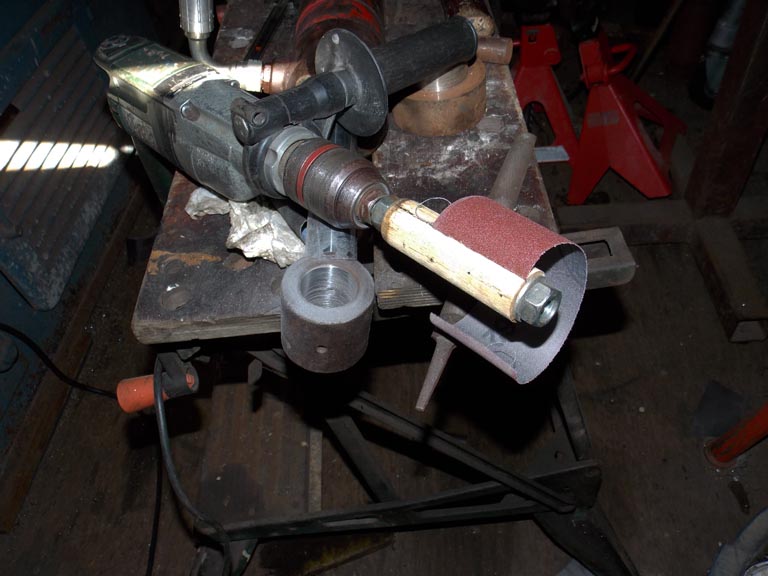
So I came up with this; A carbide burr with a guide bearing mounted in a wood router, and a guide plate cut to size on my lathe. I had to buy the bearing new. the bearing is 9mm larger than the cutter, so the guide plate hole is 39.1mm to make a 30.1mm hole
The FEL mounts also carry the pivoting Roll Over Protection Structure [ROPS] so that will need to be cut to match.
To line things up I have a piece of quite straight and true 25mm rod, and one of 30mm. They will both be used for pivot pins later.
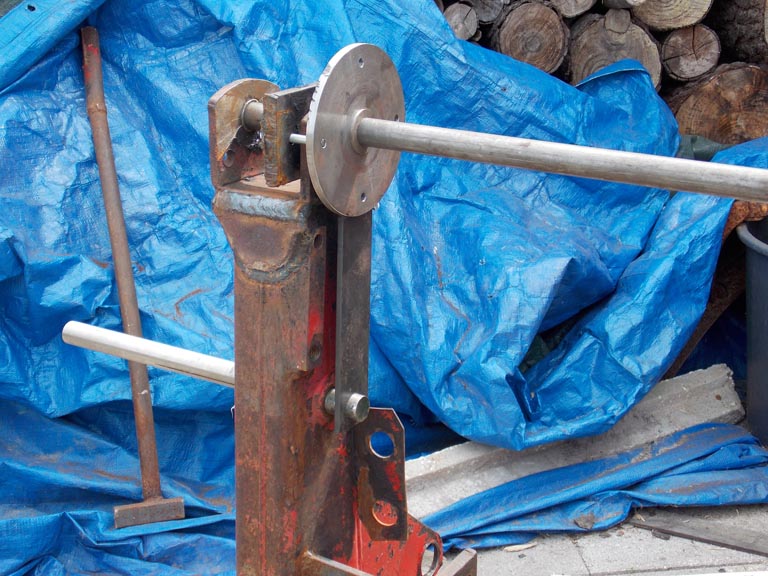
the plate clamps to the work. there's a bit of strip with a 25mm hole welded to the guide, the rod through the FEL mount sets the distance of the bore from the ROPS lock pin hole. You can see the lineup bushing between the rod and guide.
This type of cutter heats up so rapidly that I could only use it for 10 seconds at a time, and then had to wait 5 minutes for it to cool. I had some other work on the lathe at the same time, but it still took patience.
the cut come out quite nicely; the size is within my parameters too, which is a happy result. I wasn't sure.
Woops! error in the hole lineup. I tried to pull the mount into position, but no success. my 30mm rod will not slide across the holes, so the 2 pivot pins will be out of line.
So I welded a layer inside the offending hole and cut it again. this time, things are looking good [in the picture it appears the rod has sag, it doesn't. well, not visibly at least!]
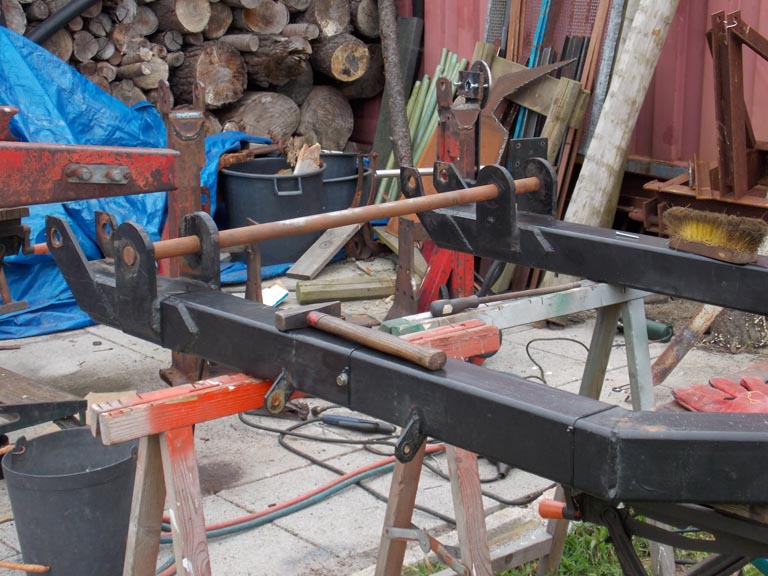
Now the rops bar. this thing is pretty heavy, about 60kg [130 lb.]. The holes aren't old or out of round, but they were made 27mm to match oversized pins of the worn out FEL pivots.
it took some time, but came out nicely. the 300mm bar fits a bit snug, but slides through by hand.
Now I have to bore out the Hydraulic cylinder ends. These things were just straight bored steel, and were also seriously out of whack, 25mm became 28. I think it's about 40 years old, and has done more work than it's designers ever intended.
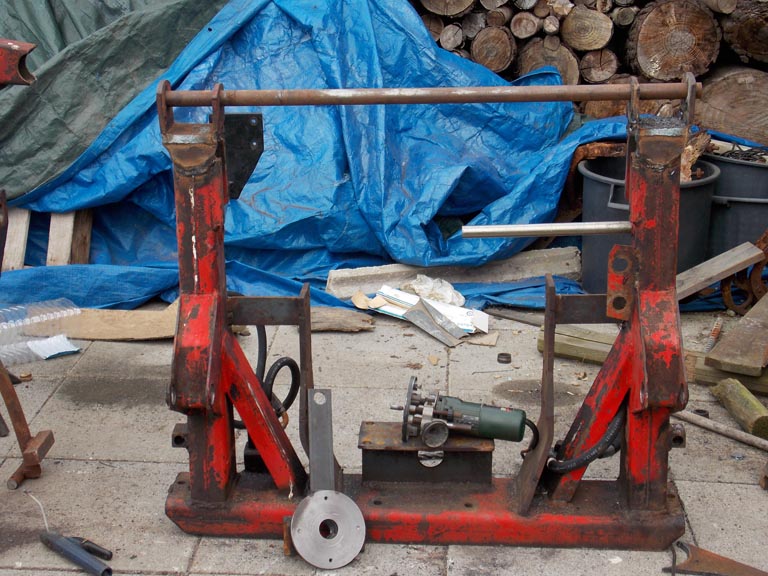
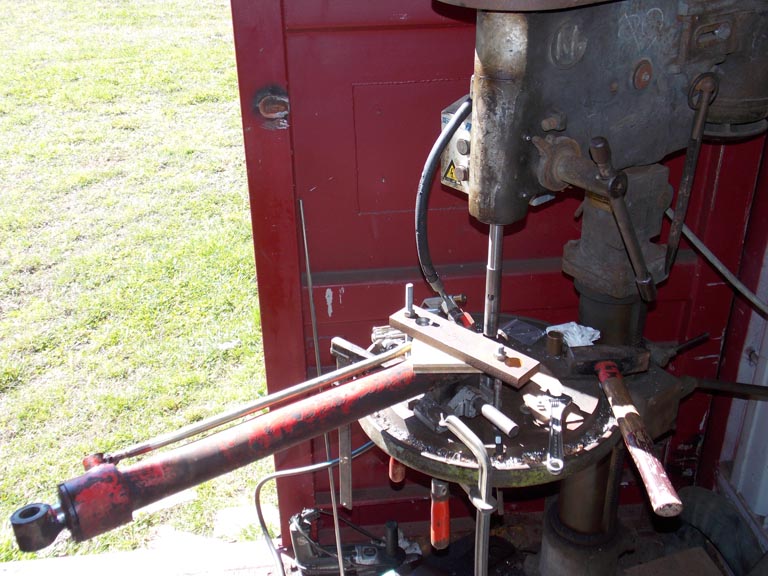
To bore these, I made this tool to fit in my big [OLD] drill press.
It took a long time to get the cylinder mounted, but the bore went ok. Not as smooth or straight as I hoped, but usable. With more practice I'm sure I could do better. The grind on the cutter wasn't optimum, and the lower bushing that holds the bottom of the boring tool steady in the drill press table quickly wore oversize due to chips getting in it.
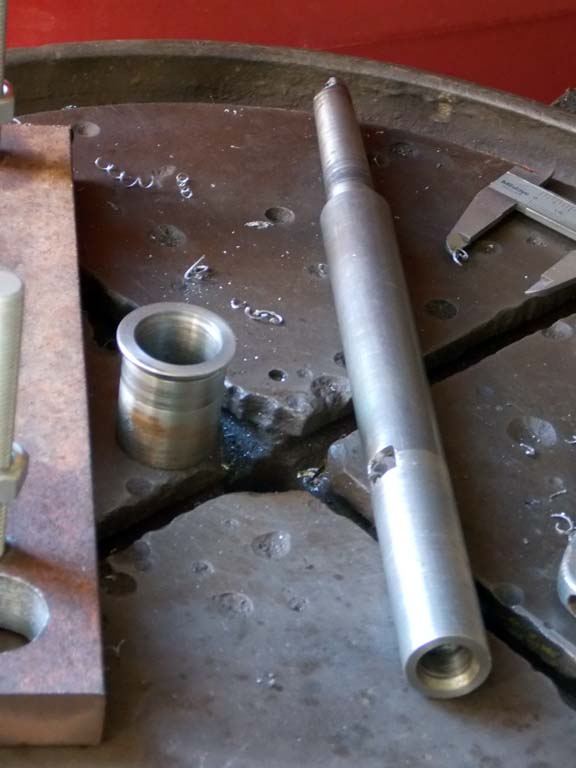
I've bored to 29.8mm, to press in bushings like the one on the table
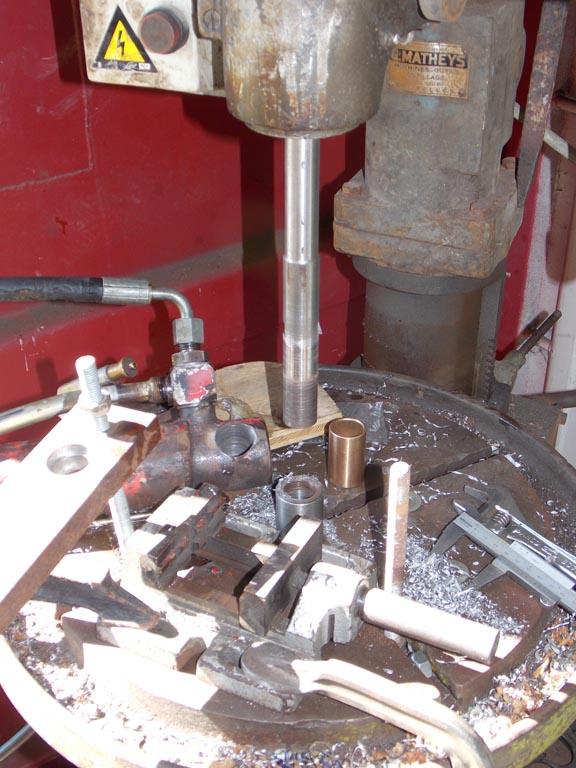
After boring, I smoothed out the holes with my homemade hone. Thanks to my Indian machinist Babalo for this idea. The trick is to size the center so you have 2 rounds of emery, or it will slip out of the slot.
For removing the FEL arm pivot blocks, I cut the circular welds with a holesaw, the straight ones with a little grinder.

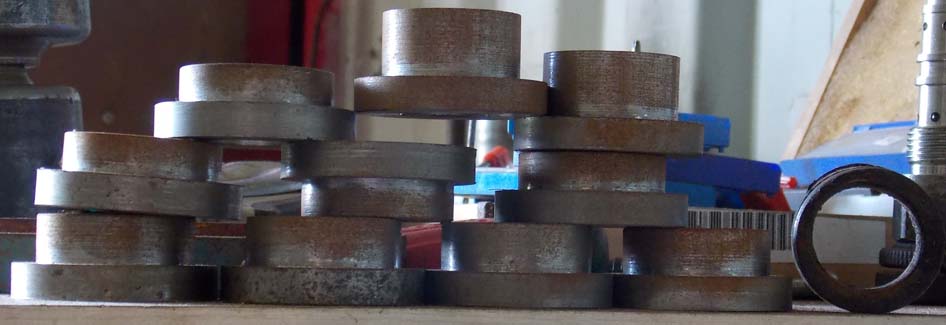
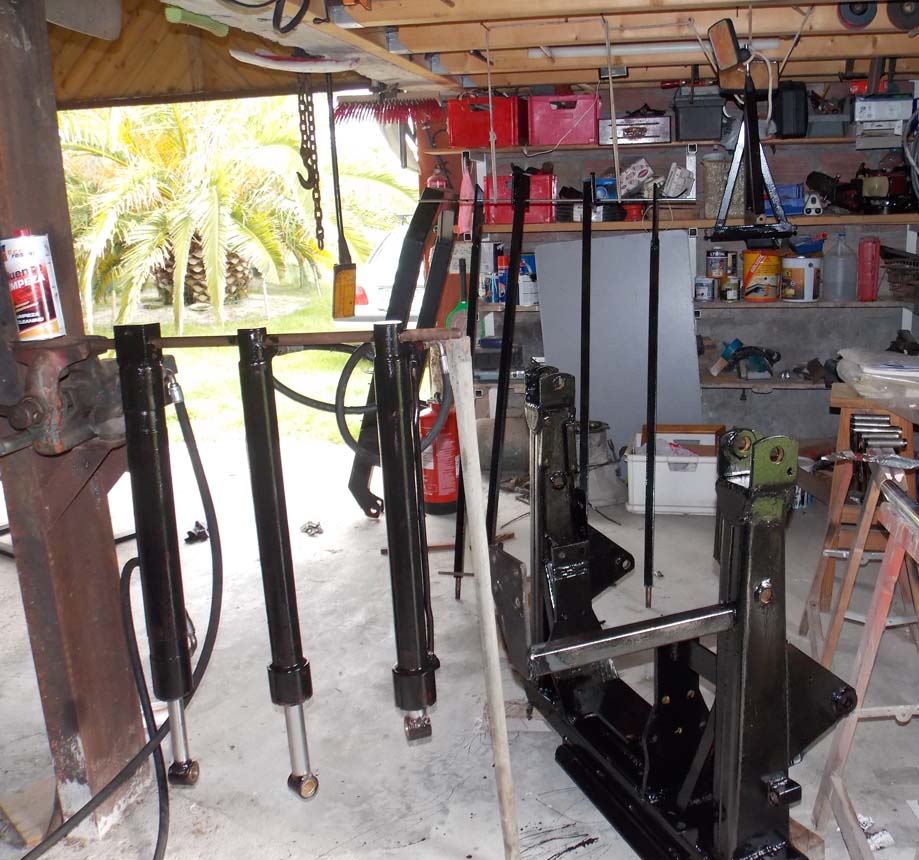
New pivots, one of the old ones, and the leftover material, a big steel rod and some bronze tube.

The new cylinder mount bushings [already a bit rusty] and one of the old ones on the right. Think it needed replacing yet?
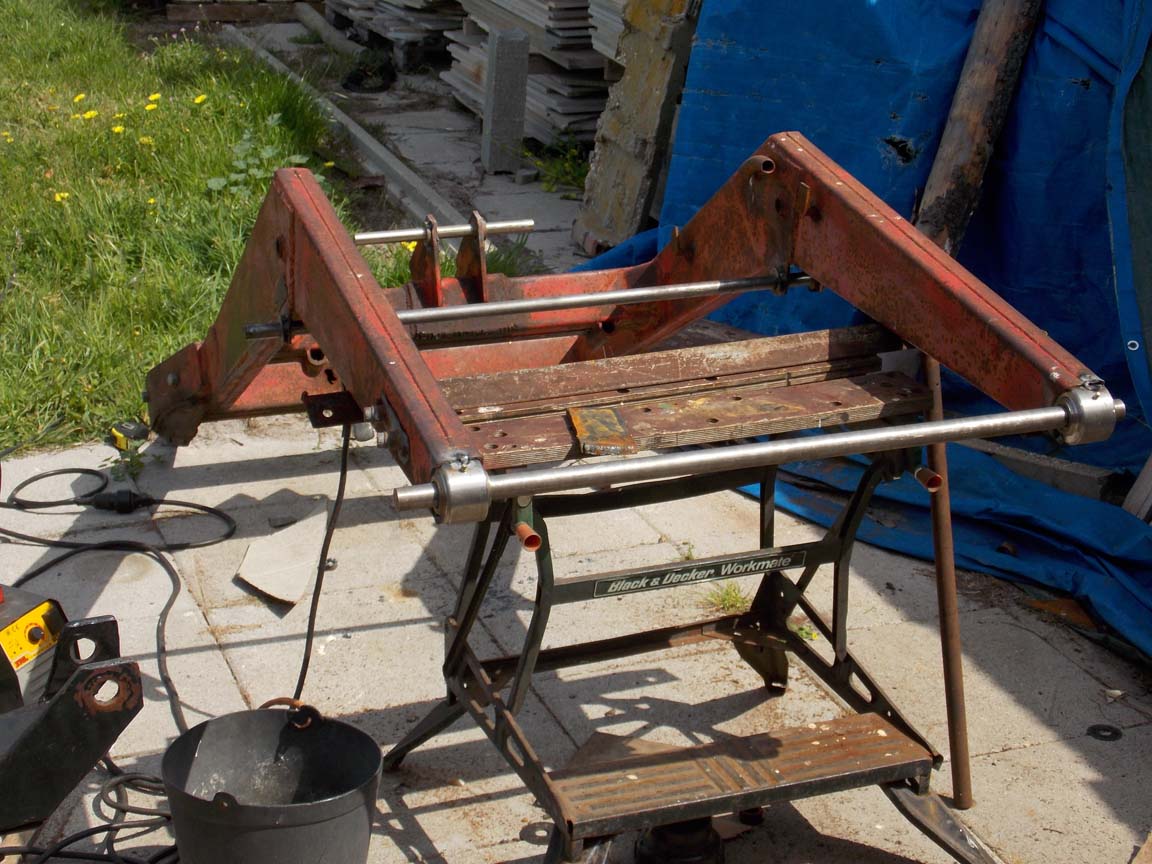
Cylinder bushings from above all welded in, and the main pivots tacked on. All 3 bars are parallel to the eye. Unfortunately despite my care, the pivot blocks moved too much during welding, and I had a pretty hard time getting them straight again. There was a lot of heat involved.
I bought this adjustable reamer on ebay to finish the 25mm bushings after pressing. the cylinder ends are chromed with the rods, so I guess the rods are original, 50 years old.

FEL arms hanging up for painting
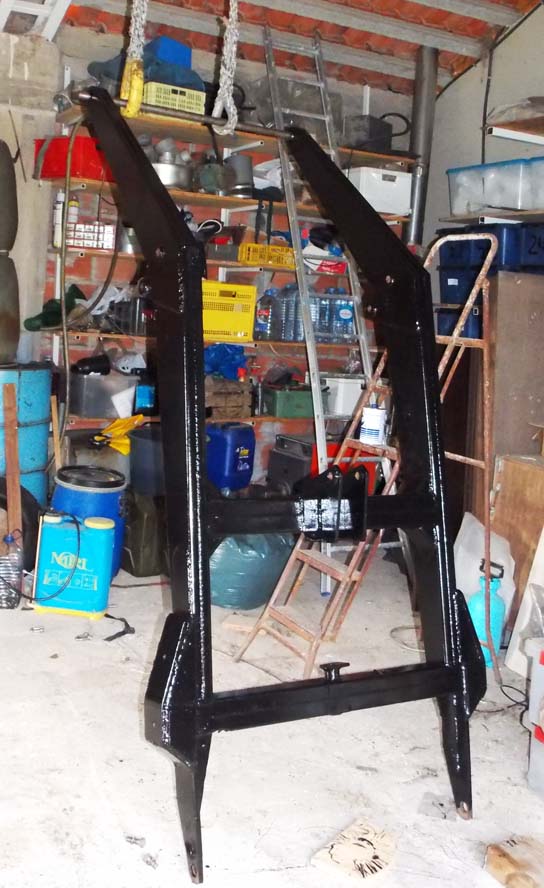
Painting the other parts; sure, I could have sandblasted it all, then primed with zinc-chromate, then painted with correct brand color. Instead I just smear a lot of black hammerite over it all.
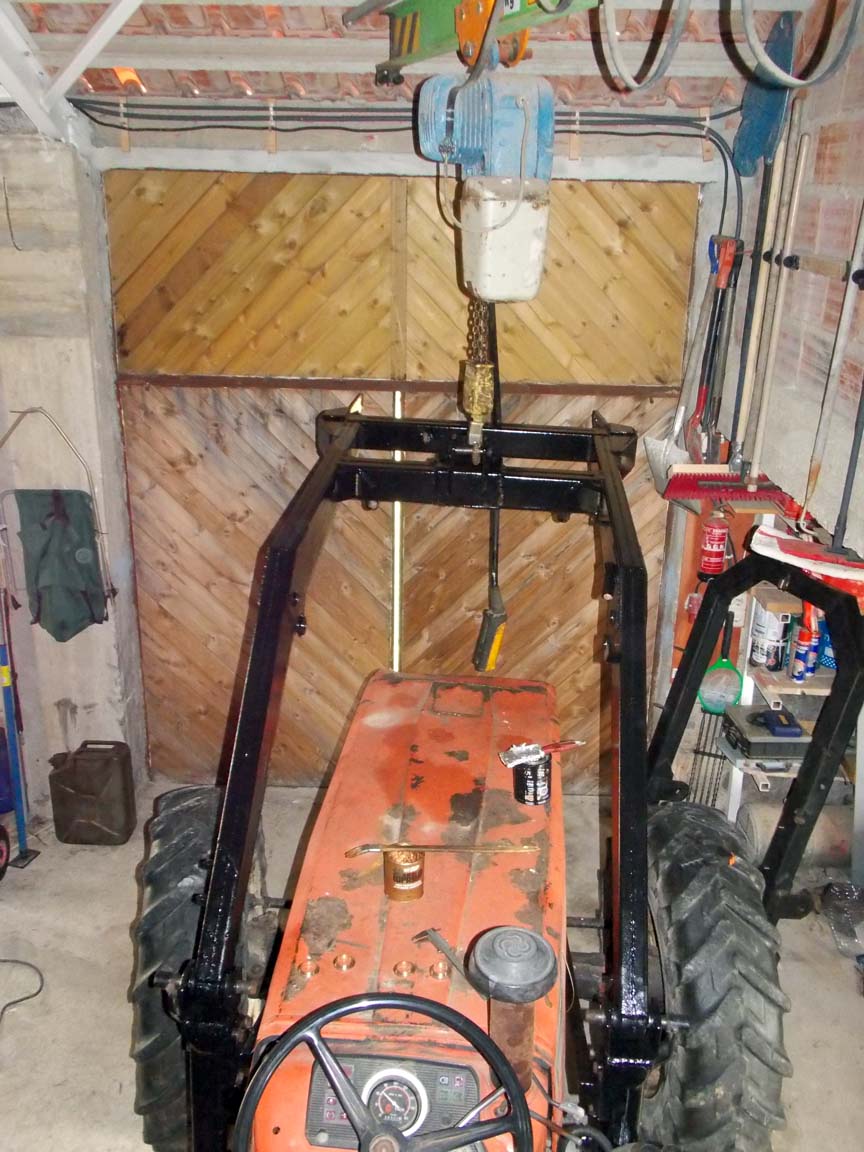
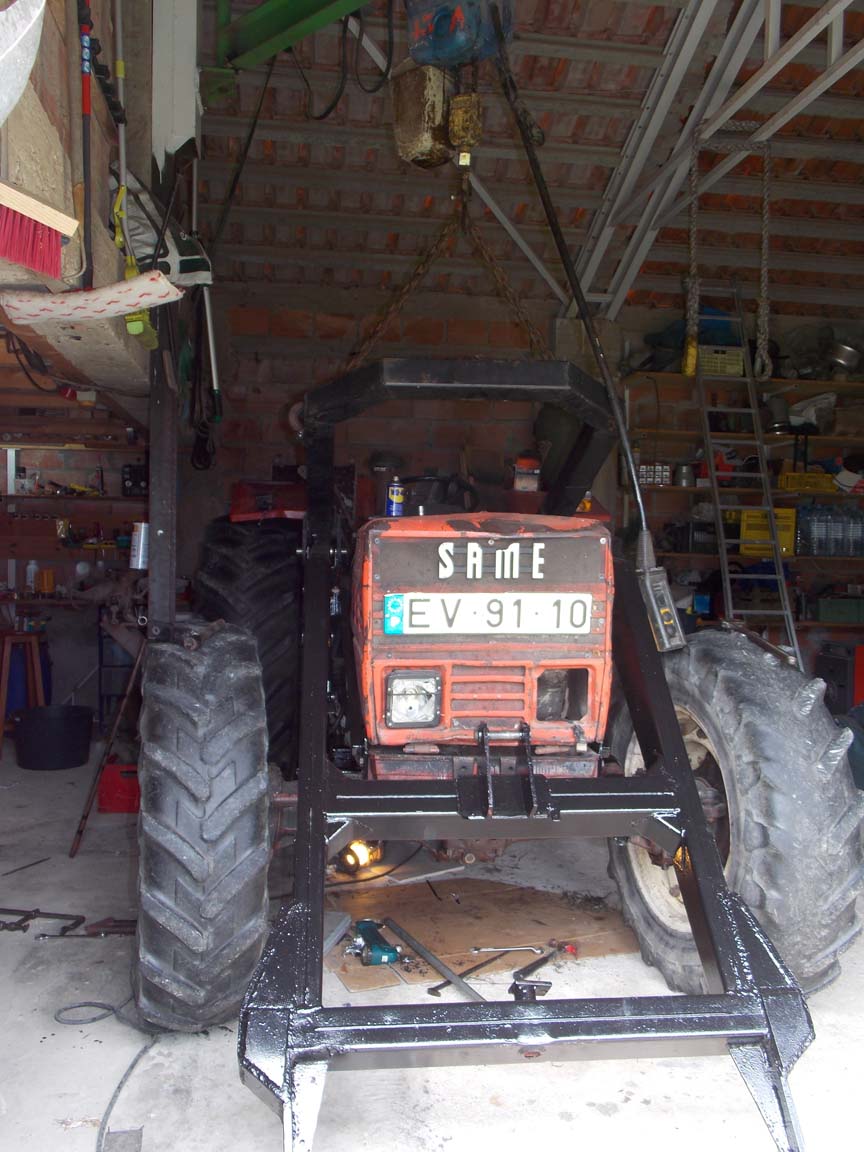
After bolting the mounting frame tight, I set the FEL arms on the pivots before measuring and cutting the side thrust bushings [visible on the engine cover].
Update 2020;
I've done a lot more work on the FEL and the hydraulics on the tractor. I'll post the system hydraulics separately.
First thing; new lift cylinder seals. It looks like they could do with replacing...
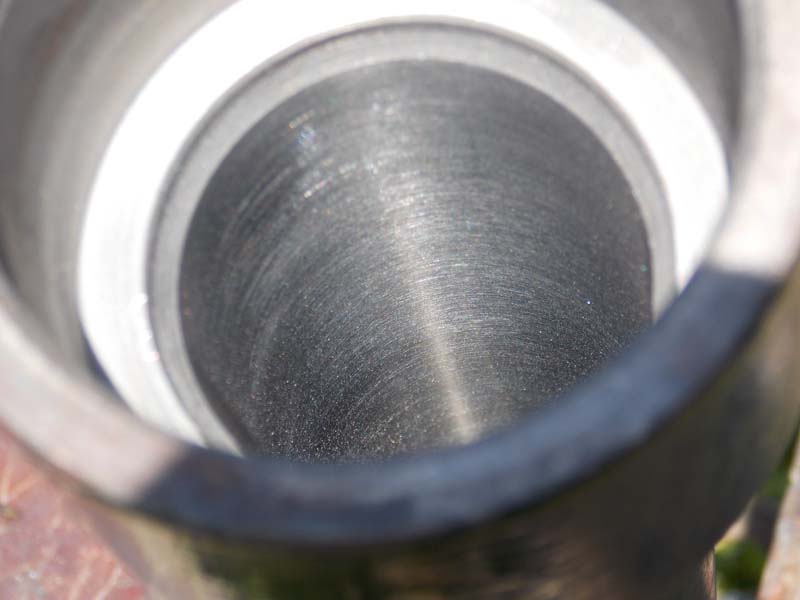
First step was honing the bores. There's a machine for this somewhere, and these days people just replace the whole cylinder because they're not expensive now. But I made this long reach boring tool and honed it with my drill.
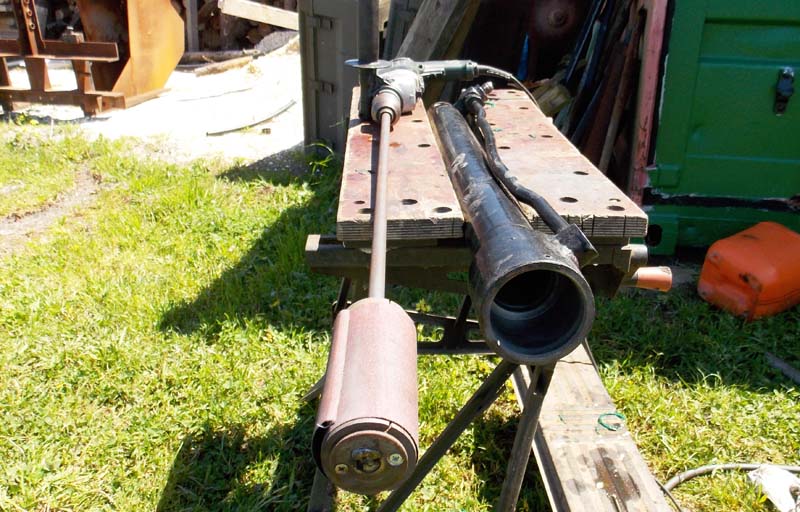
It took some time, but it looks nice now. the scores are all gone.
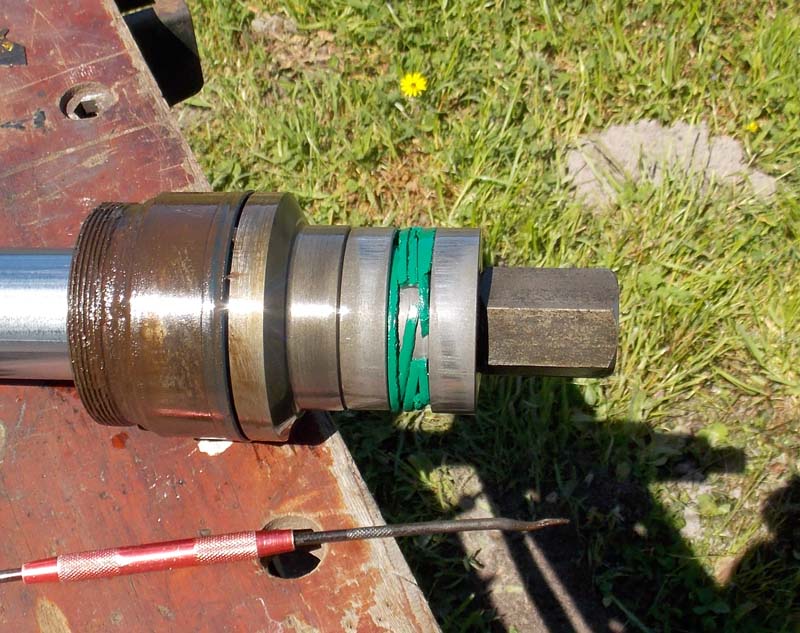
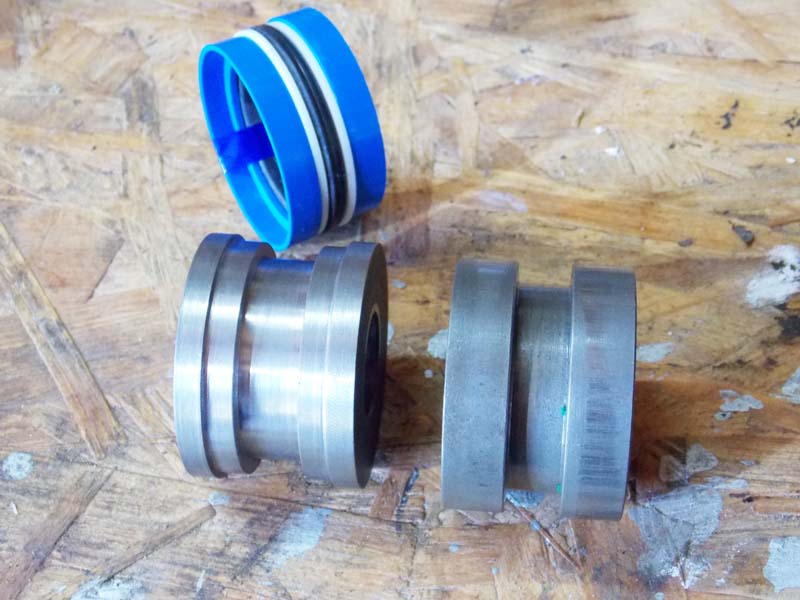
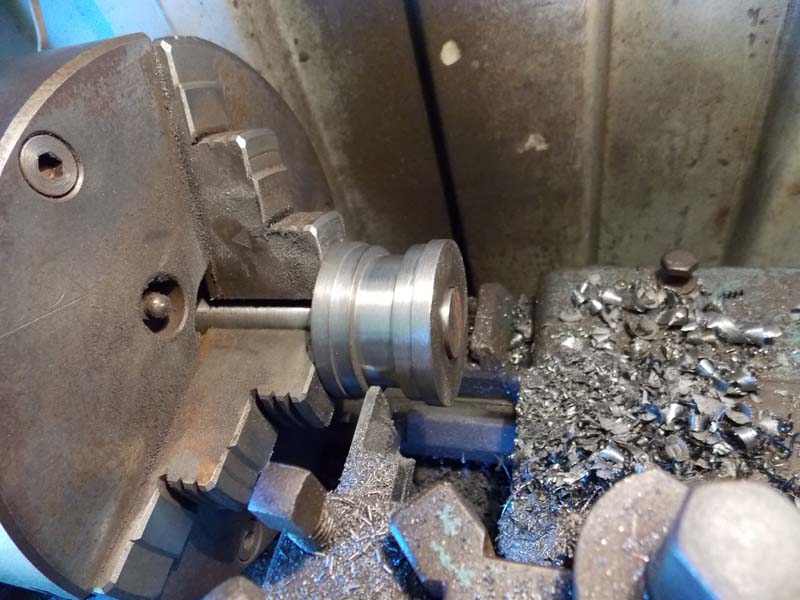
Curious; the pistons in it [one on the right] were 51.0mm, a size that does not exist. The bore must have once been 2", 50.8mm, and I'm not the first in there. The pistons were eccentric too. The new seals are a different style, they have plastic sliders and need a stepped piston. So I made a pair to suite.
By cutting the rod first, then pushing the bored piece of rod onto it, I got a nicely centered part.
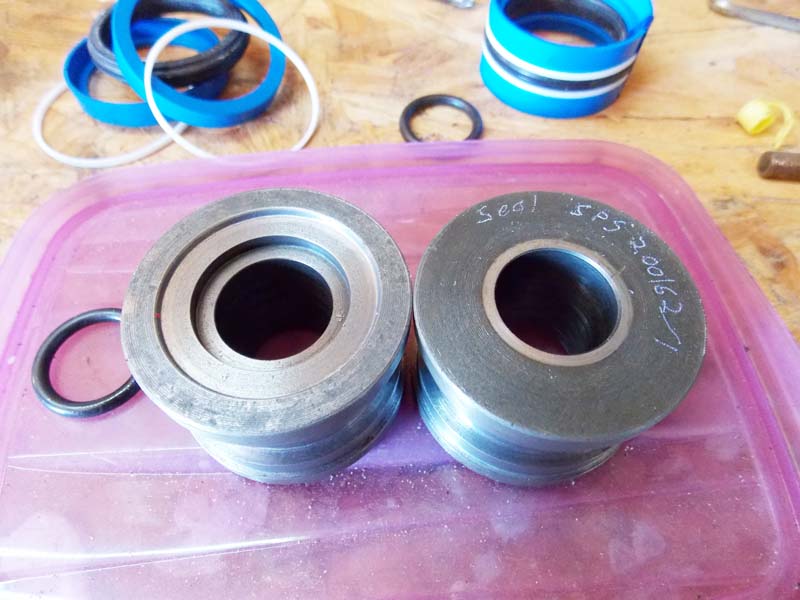
In case the next person to take it apart needs the seal number...
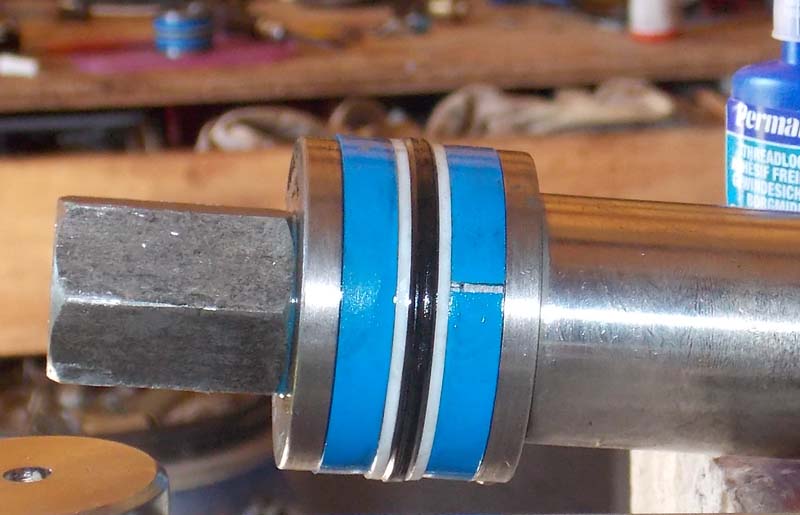
Ah, satisfying.
The small gap in the plastic slide rings is due to the slightly oversized piston that fits the oversized cylinder bore.
The oil seal is flexible enough to take it.
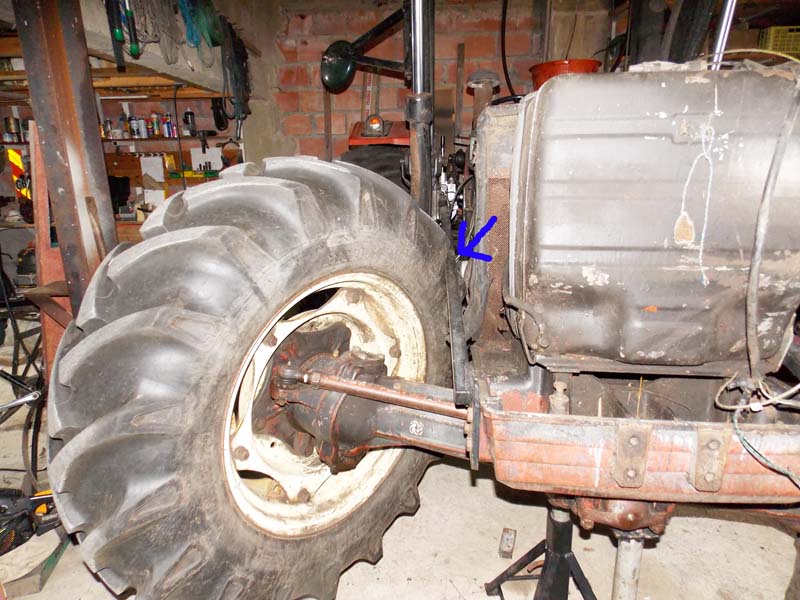
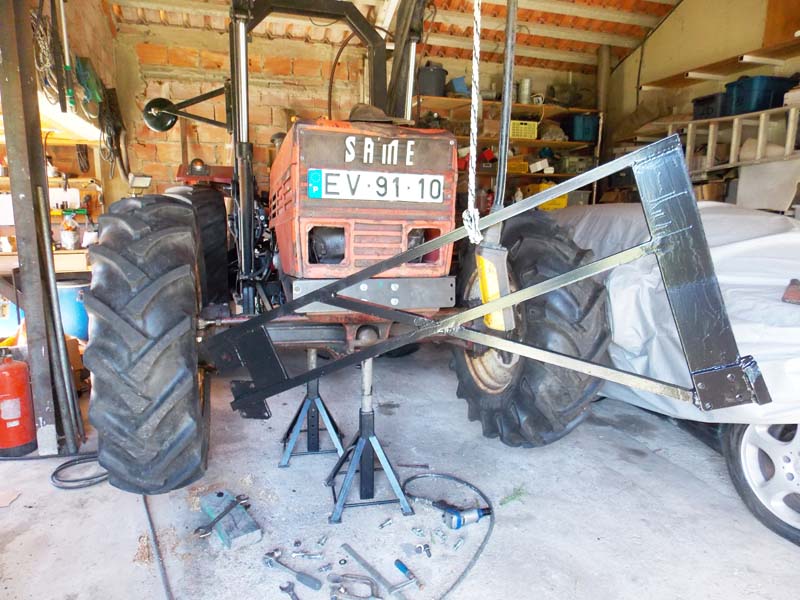
skipping a couple of years, in September 2020 I decided it's time to solve a problem that's always bothered me; the forward diagonal brace interferes with the steering when the front axle is tilted up.
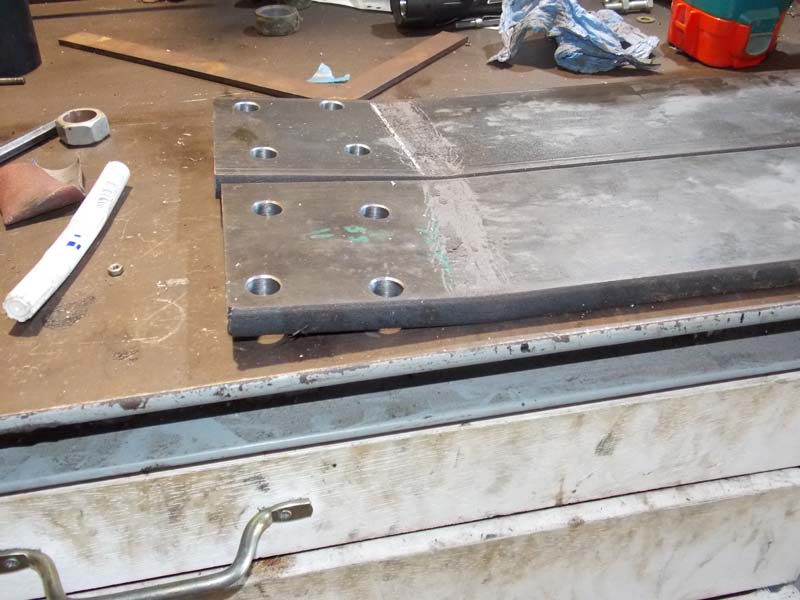
I bought some heavy steel strip, 15x200mm for the uprights. They just need a little bend.
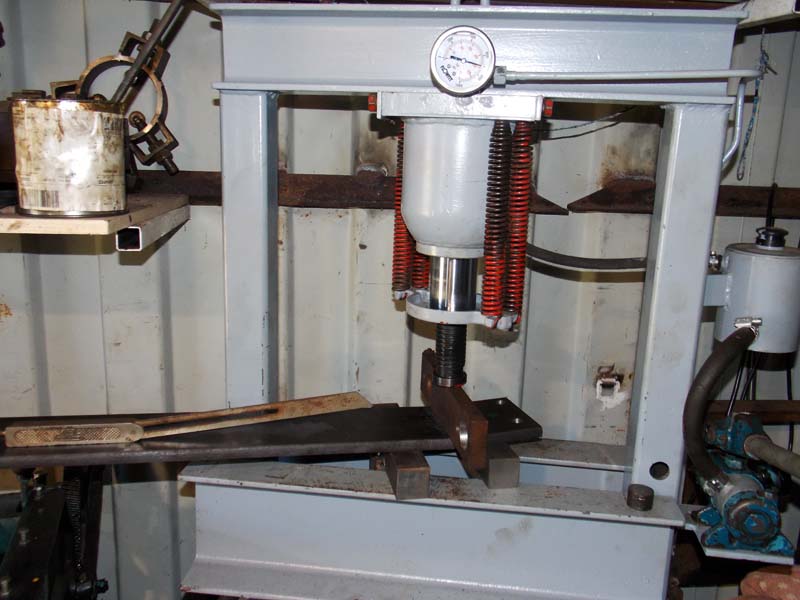
16 tons on my home made shop press
Bored and bent;
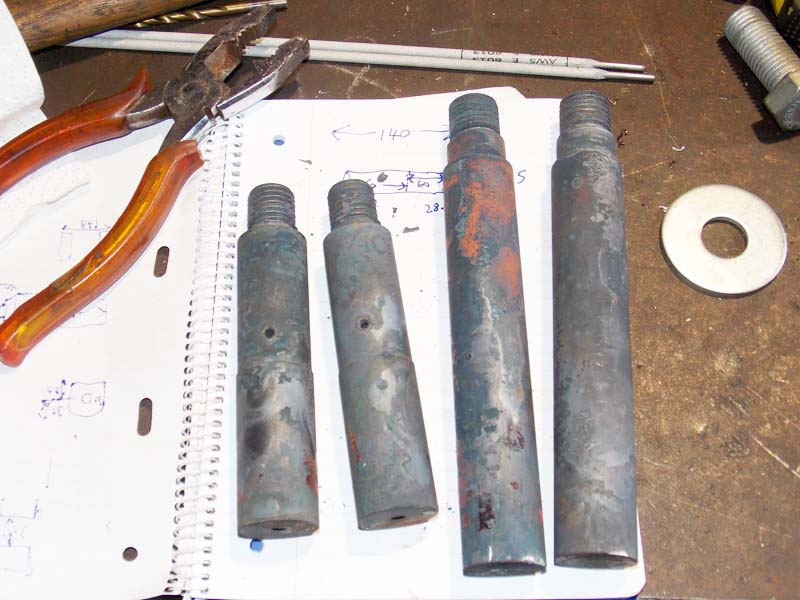
I needed new pivot pins, and I decided they should be hardened. I did it in an oven, and there was some oxidization.
Next time, I'll use a torch. Less precise, but it's fast and there's less damage. Smaller pins are for a new bucket pivot.
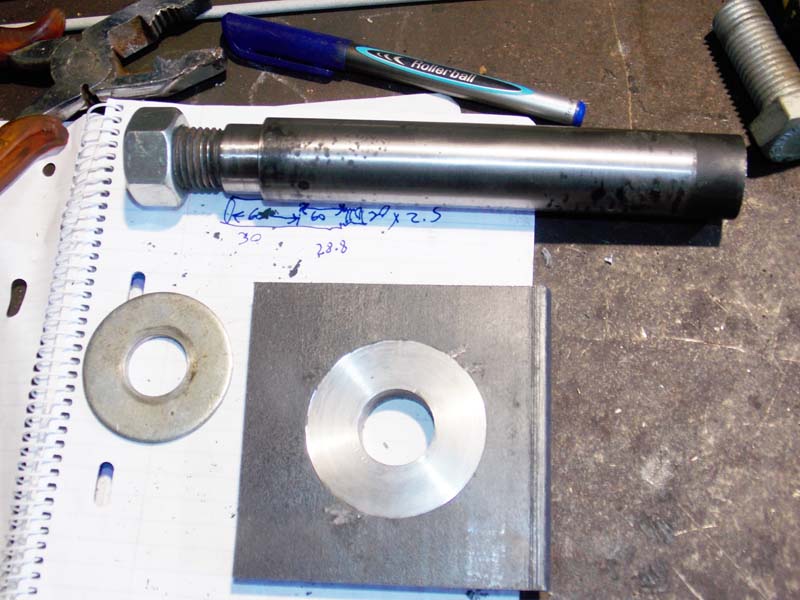
Pin is polished and I made plates with matching bores. the hole is 25mm, fits the shoulder of the pins. nuts are 22mm, I had them in a drawer.
New side brace, it weighs 43kg. sold 30x30 square rod and thick plate.
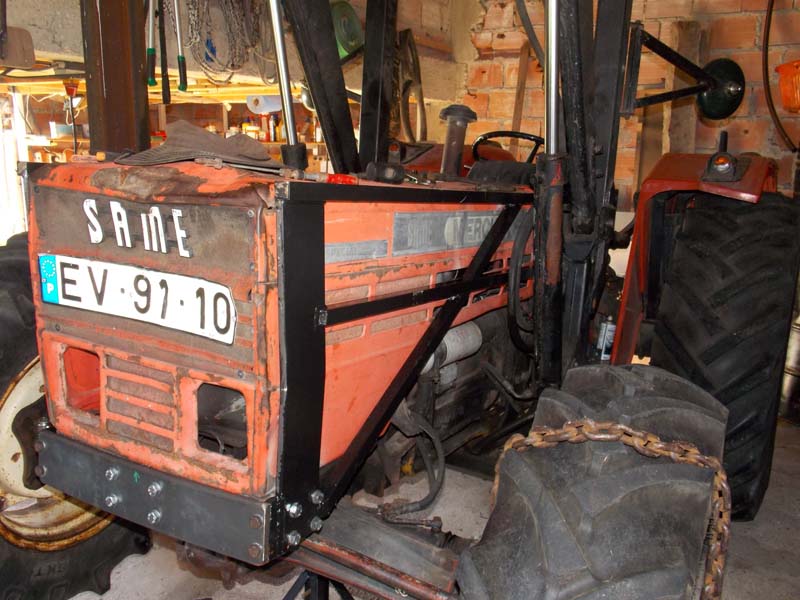
At full tilt and lock, the tire clears now.
![]()
Bolted on, it looks better than I'd hoped. The lines blend in ok. The front 'bumper' plate is bolted to the side braces with 2 14mm bolts on each side. That was tricky. Just above the headlights the side plate is bent in slightly to follow the shape of the engine cover.
The loader arms still block the steering when they're down though. A job for another day!